

The Complete Guide to Syncing, Part 1: The Basics — 11 Tips to Make the Three Views Your Own
Just opened Syncing for the first time? The screen looks simple, but there's a surprising amount of depth once you know where to look. This single article covers the basics end to end — 11 tips, in the order you'll actually use them day to day. Even skimming the figures gets you halfway there, so scroll at your own pace. 🙂
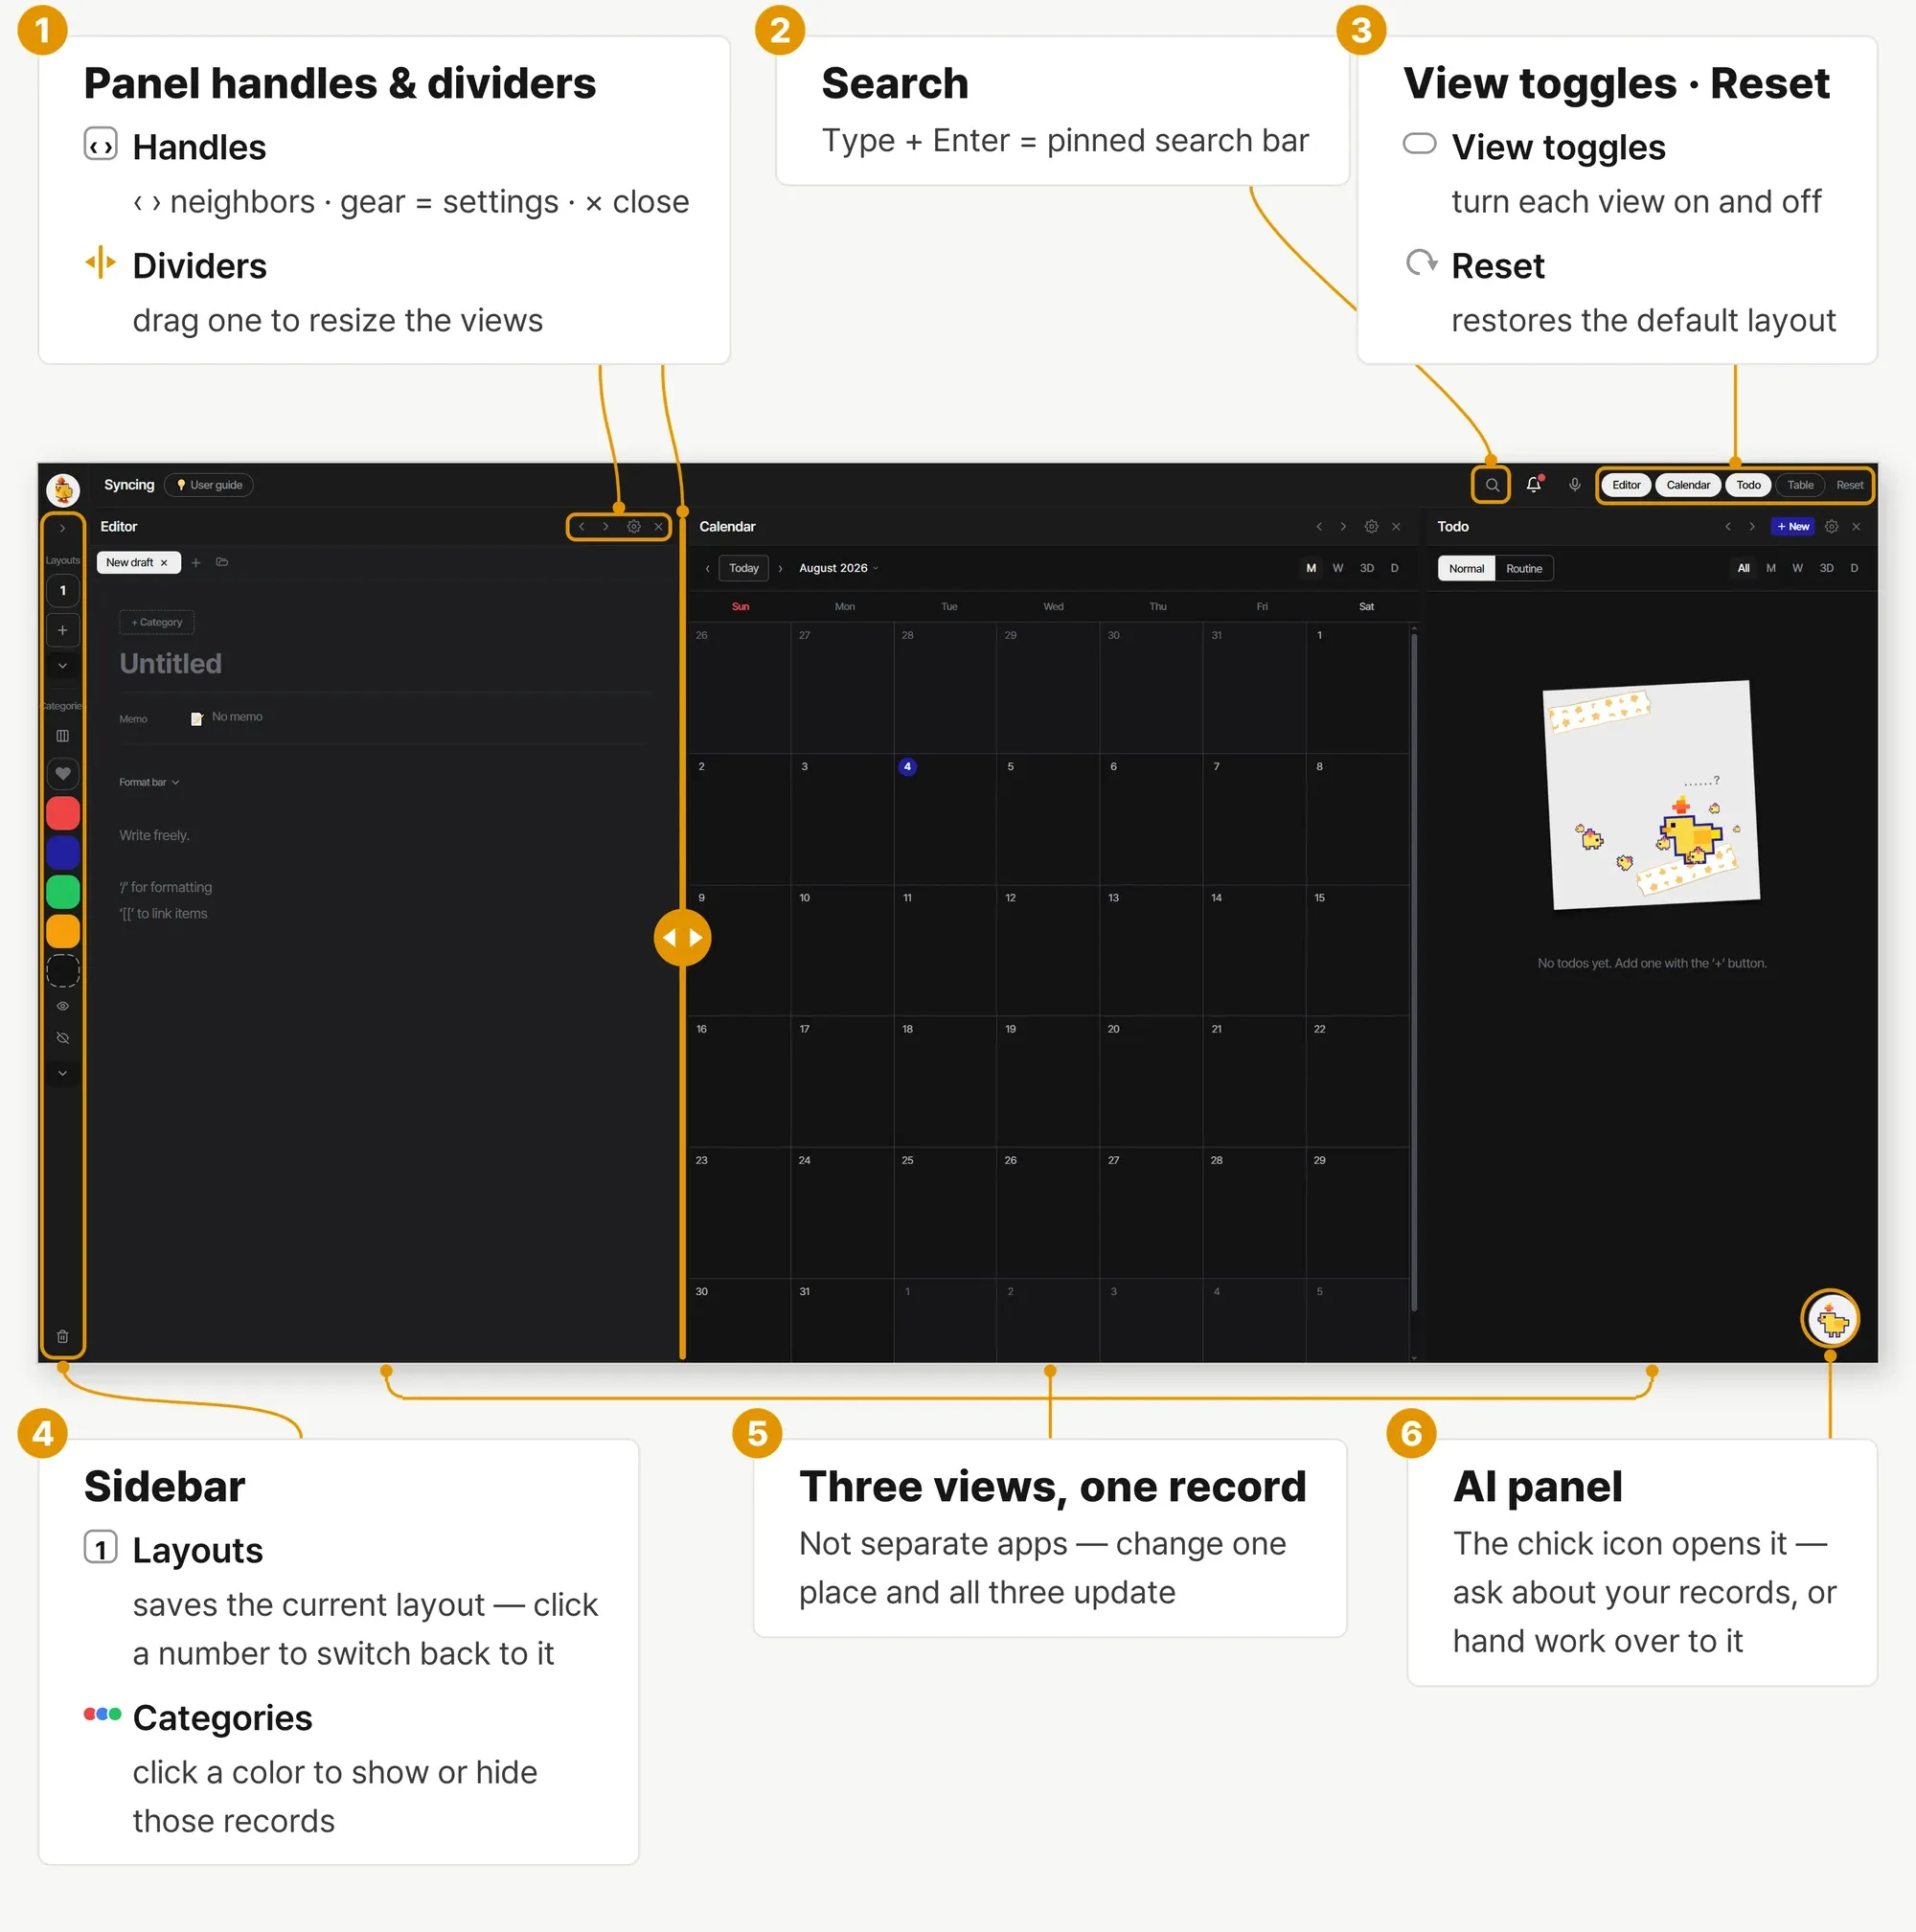
The three views mirror one record 🗺️
Here is the one thing to understand first. Todo, Calendar, and Table are not three separate apps — they are three windows onto the same record, from different angles. Something you write as a to-do also exists as a block on the calendar and a row in the table, all at once. Edit it in any view and the others change on the spot — the “wait, where did I write that?” problem simply disappears. The figure below lays out the whole screen at a glance.
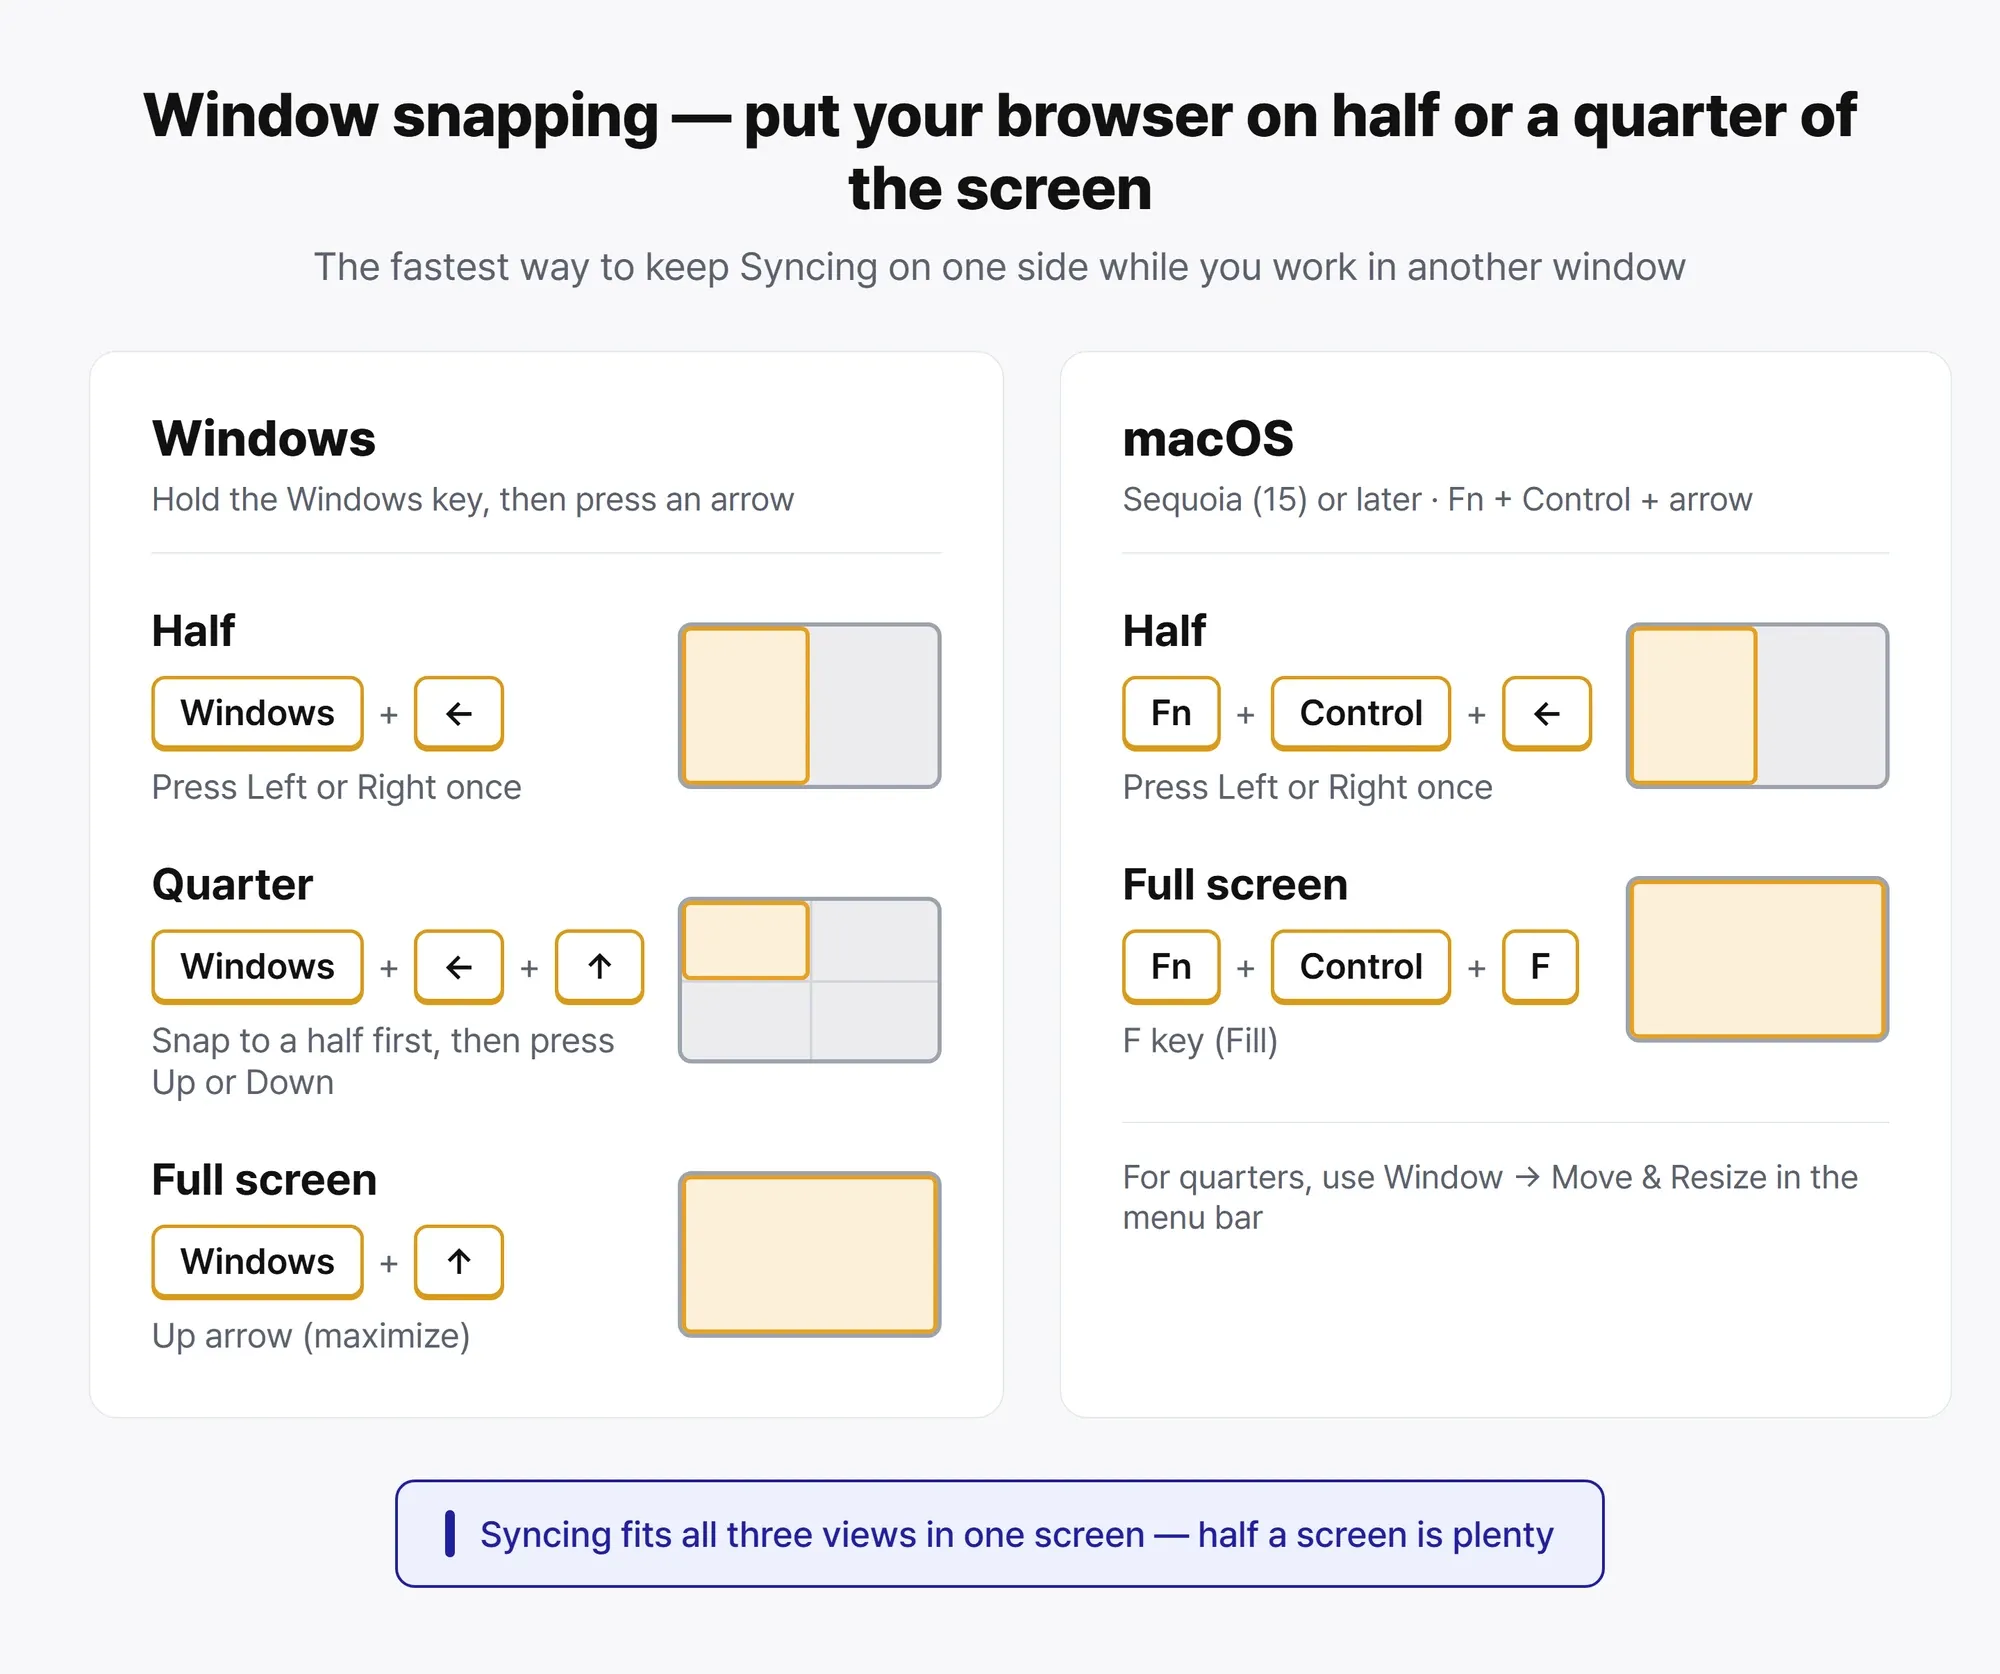
Window snapping — half a screen is plenty 🪟
Syncing doesn’t need your whole screen. It actually shines when you snap the browser to one half of the screen and work side by side with another window — taking notes while reading meeting minutes, or scheduling while researching. One shortcut is all it takes.
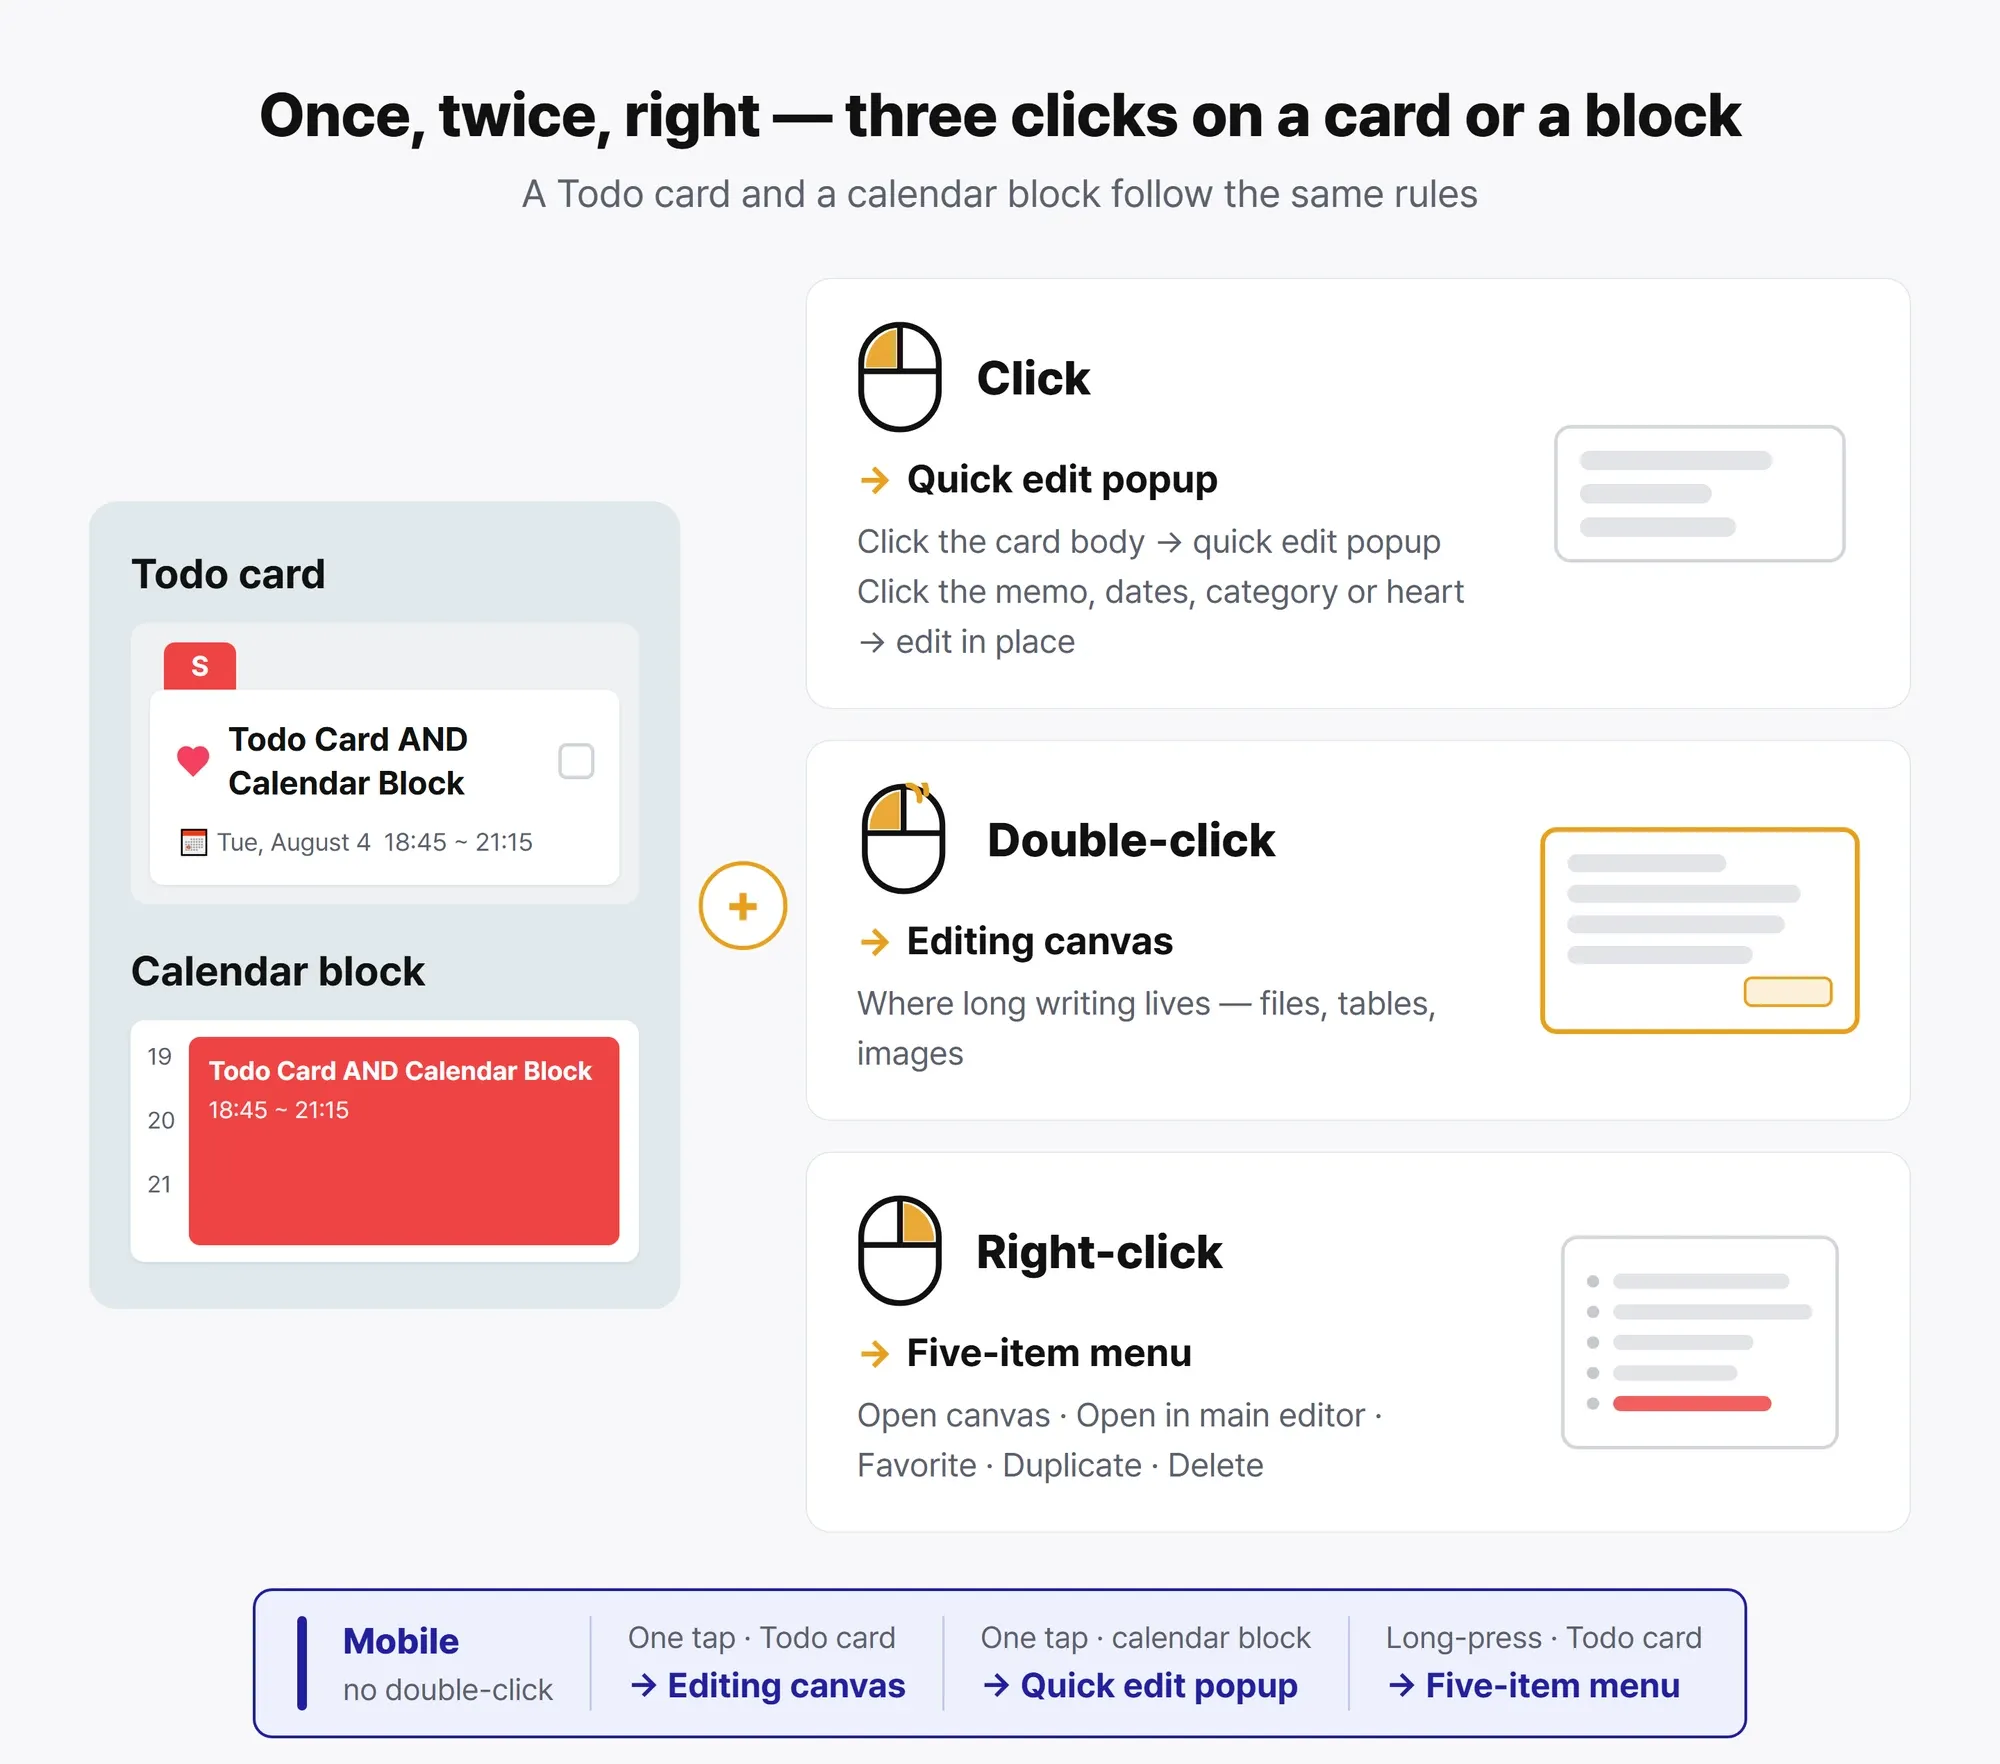
Double-click matters most — the three clicks 🖱️
Whether it’s a Todo card or a calendar block, everything speaks the same click grammar. One click selects — the card is highlighted, or a small popup opens for quick edits to the title and time. Right-click is the menu — duplicate, favorite, delete, and friends. And the most important of the three: double-click means “open.” Double-click any card or calendar block and its editing canvas opens wide, with the body, memo, and dates all editable. Tables work the same way — double-click a cell and you’re editing right there. Whenever you’re not sure what to press, just double-click. That one habit will carry you a long way.
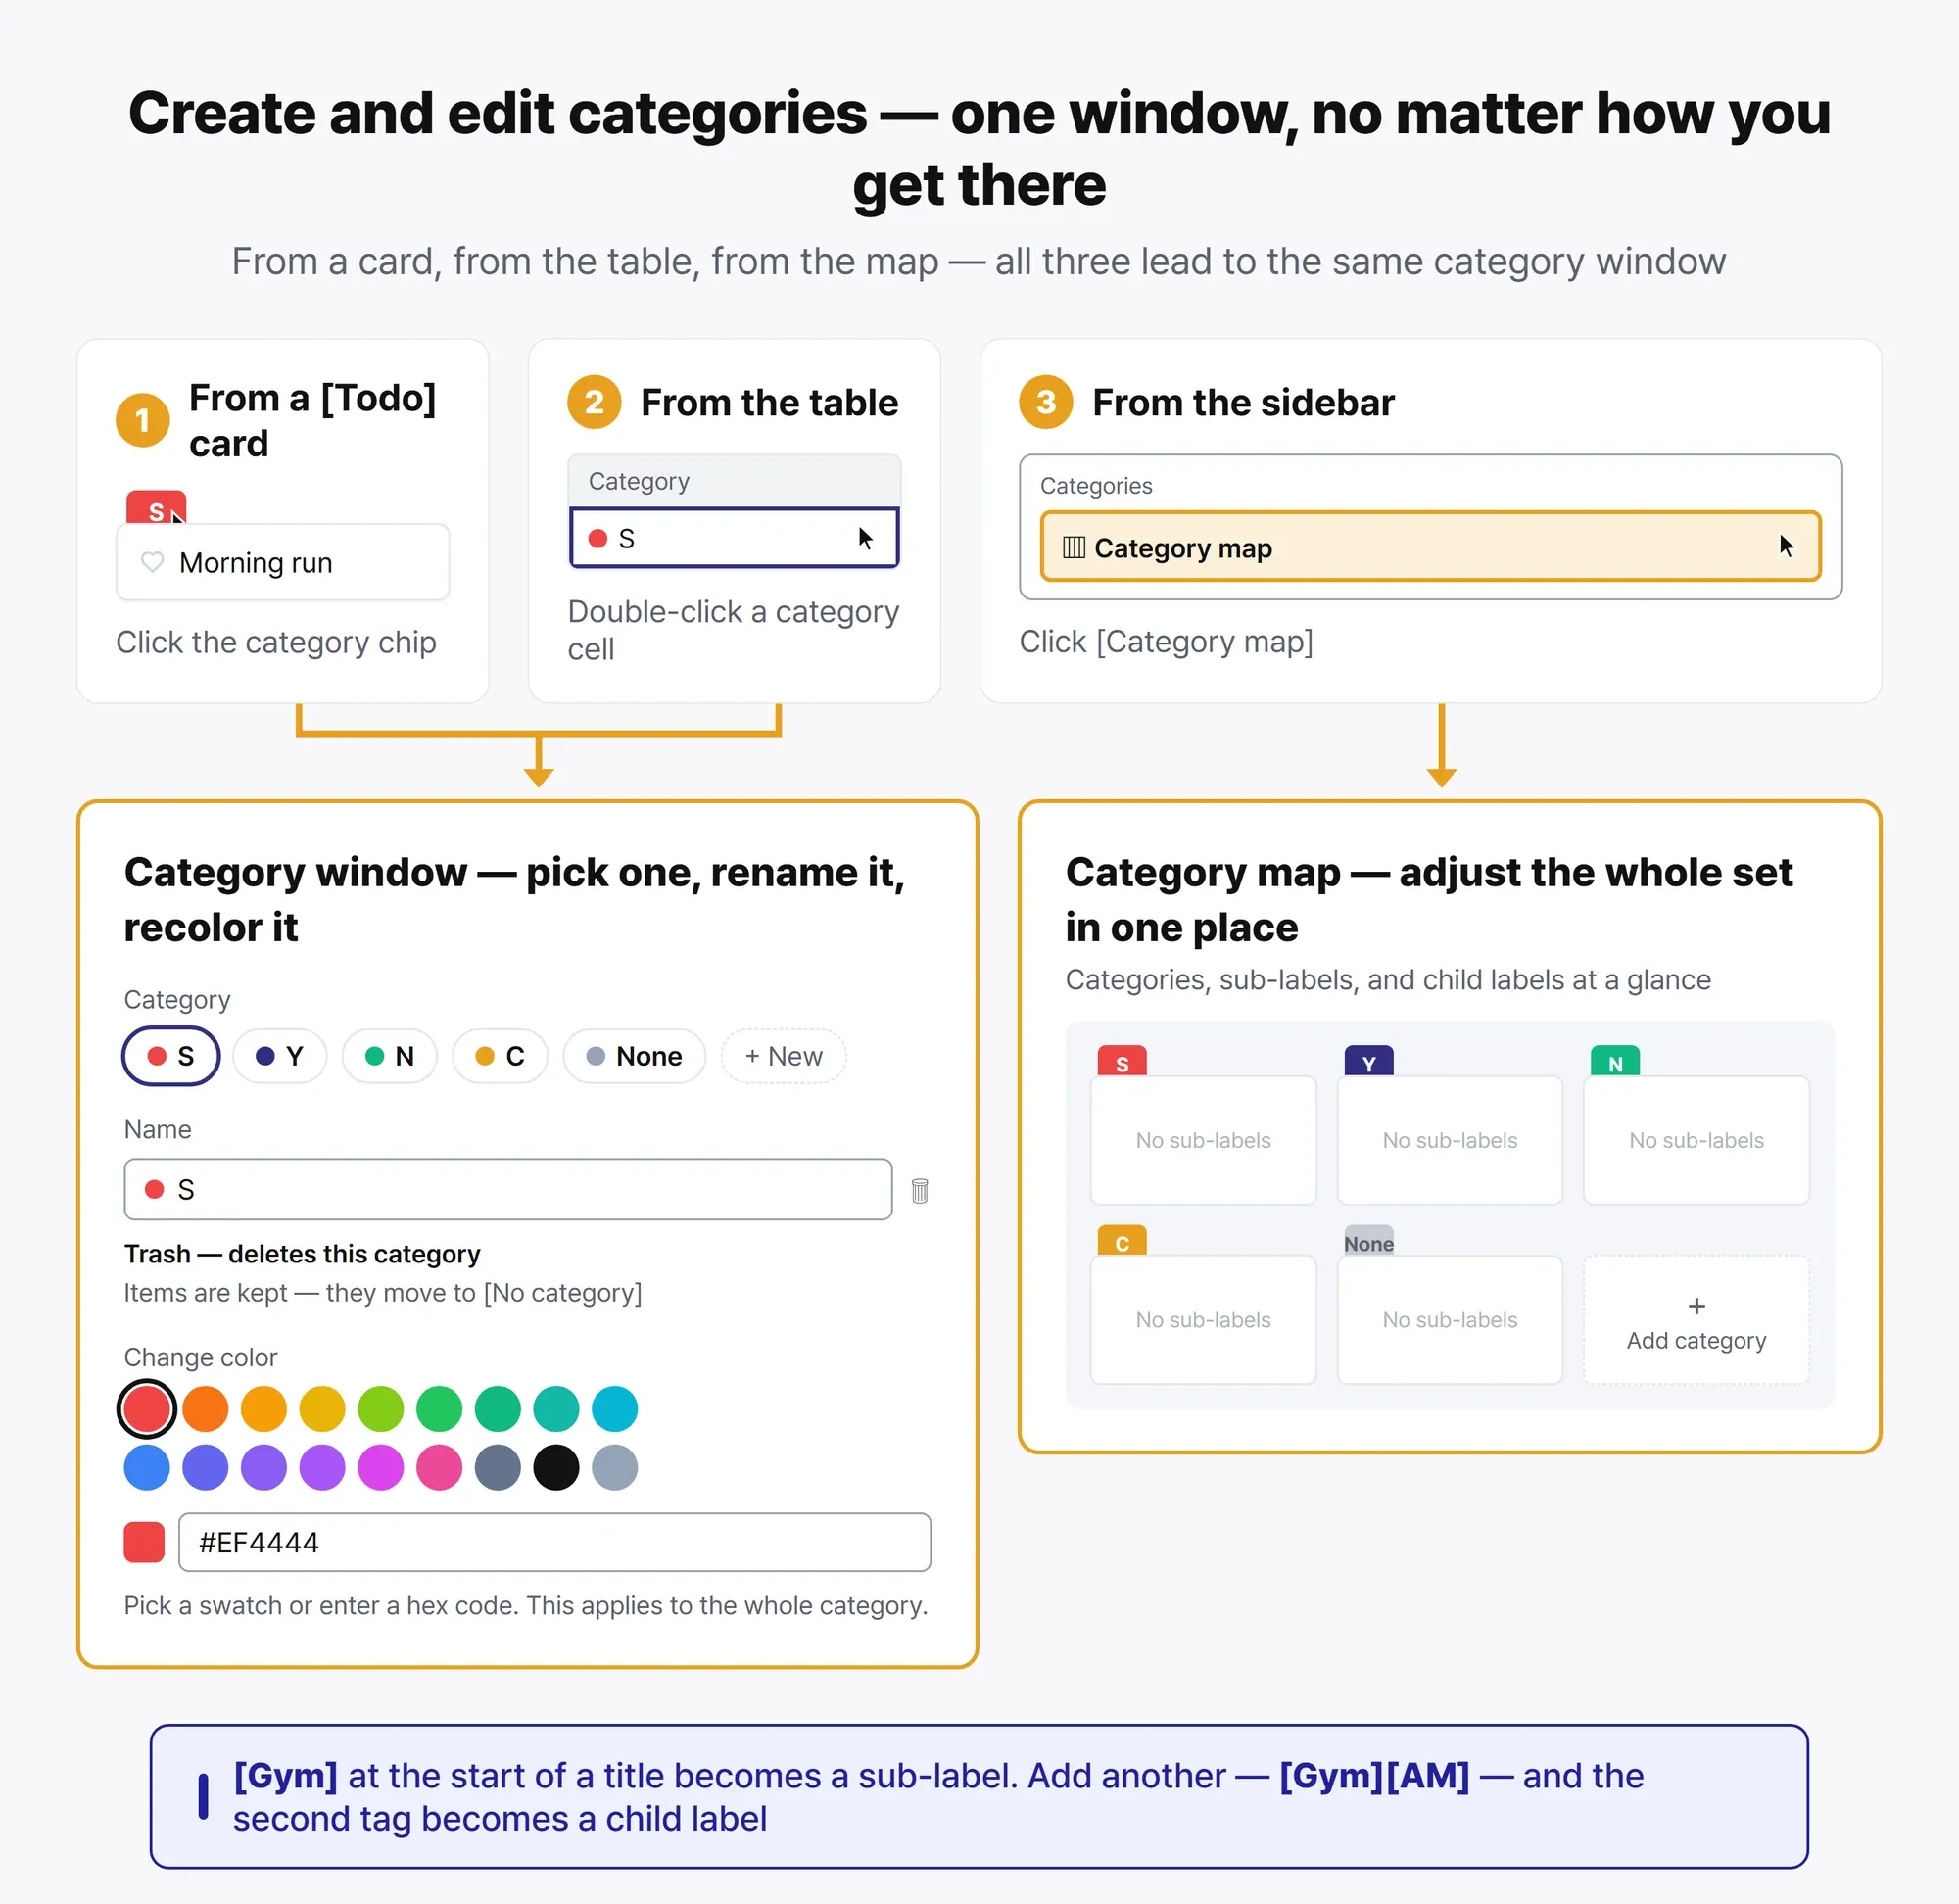
Categories — color is where organizing begins 🎨
Once records pile up, you’ll want categories. Syncing’s categories come in two layers. The backbone layer is the colored category label — the colored marker built into every Todo card. Click the label to pick a category or open the window where you edit its name and color. The same window opens from a table cell too, and the category map in the sidebar lets you tune everything in one place. Below that sits the sub-category layer — put [a name] at the very front of a title and it becomes a sub-category under that item’s category. [Workout] Morning run creates a “Workout” sub-category under the current category, and chaining brackets like [Workout][Morning] splits it into finer levels. Sub-categories need no setup — they exist the moment you type them, and typing a sub-category name you’ve used before assigns the parent category automatically. Once your system settles in, it gets even faster — type just [ in the editing canvas title and the sub-category list appears; pick one with the arrow keys and Tab, and the new item’s category is set in one motion.
Visibility — keep only what you need right now 👀
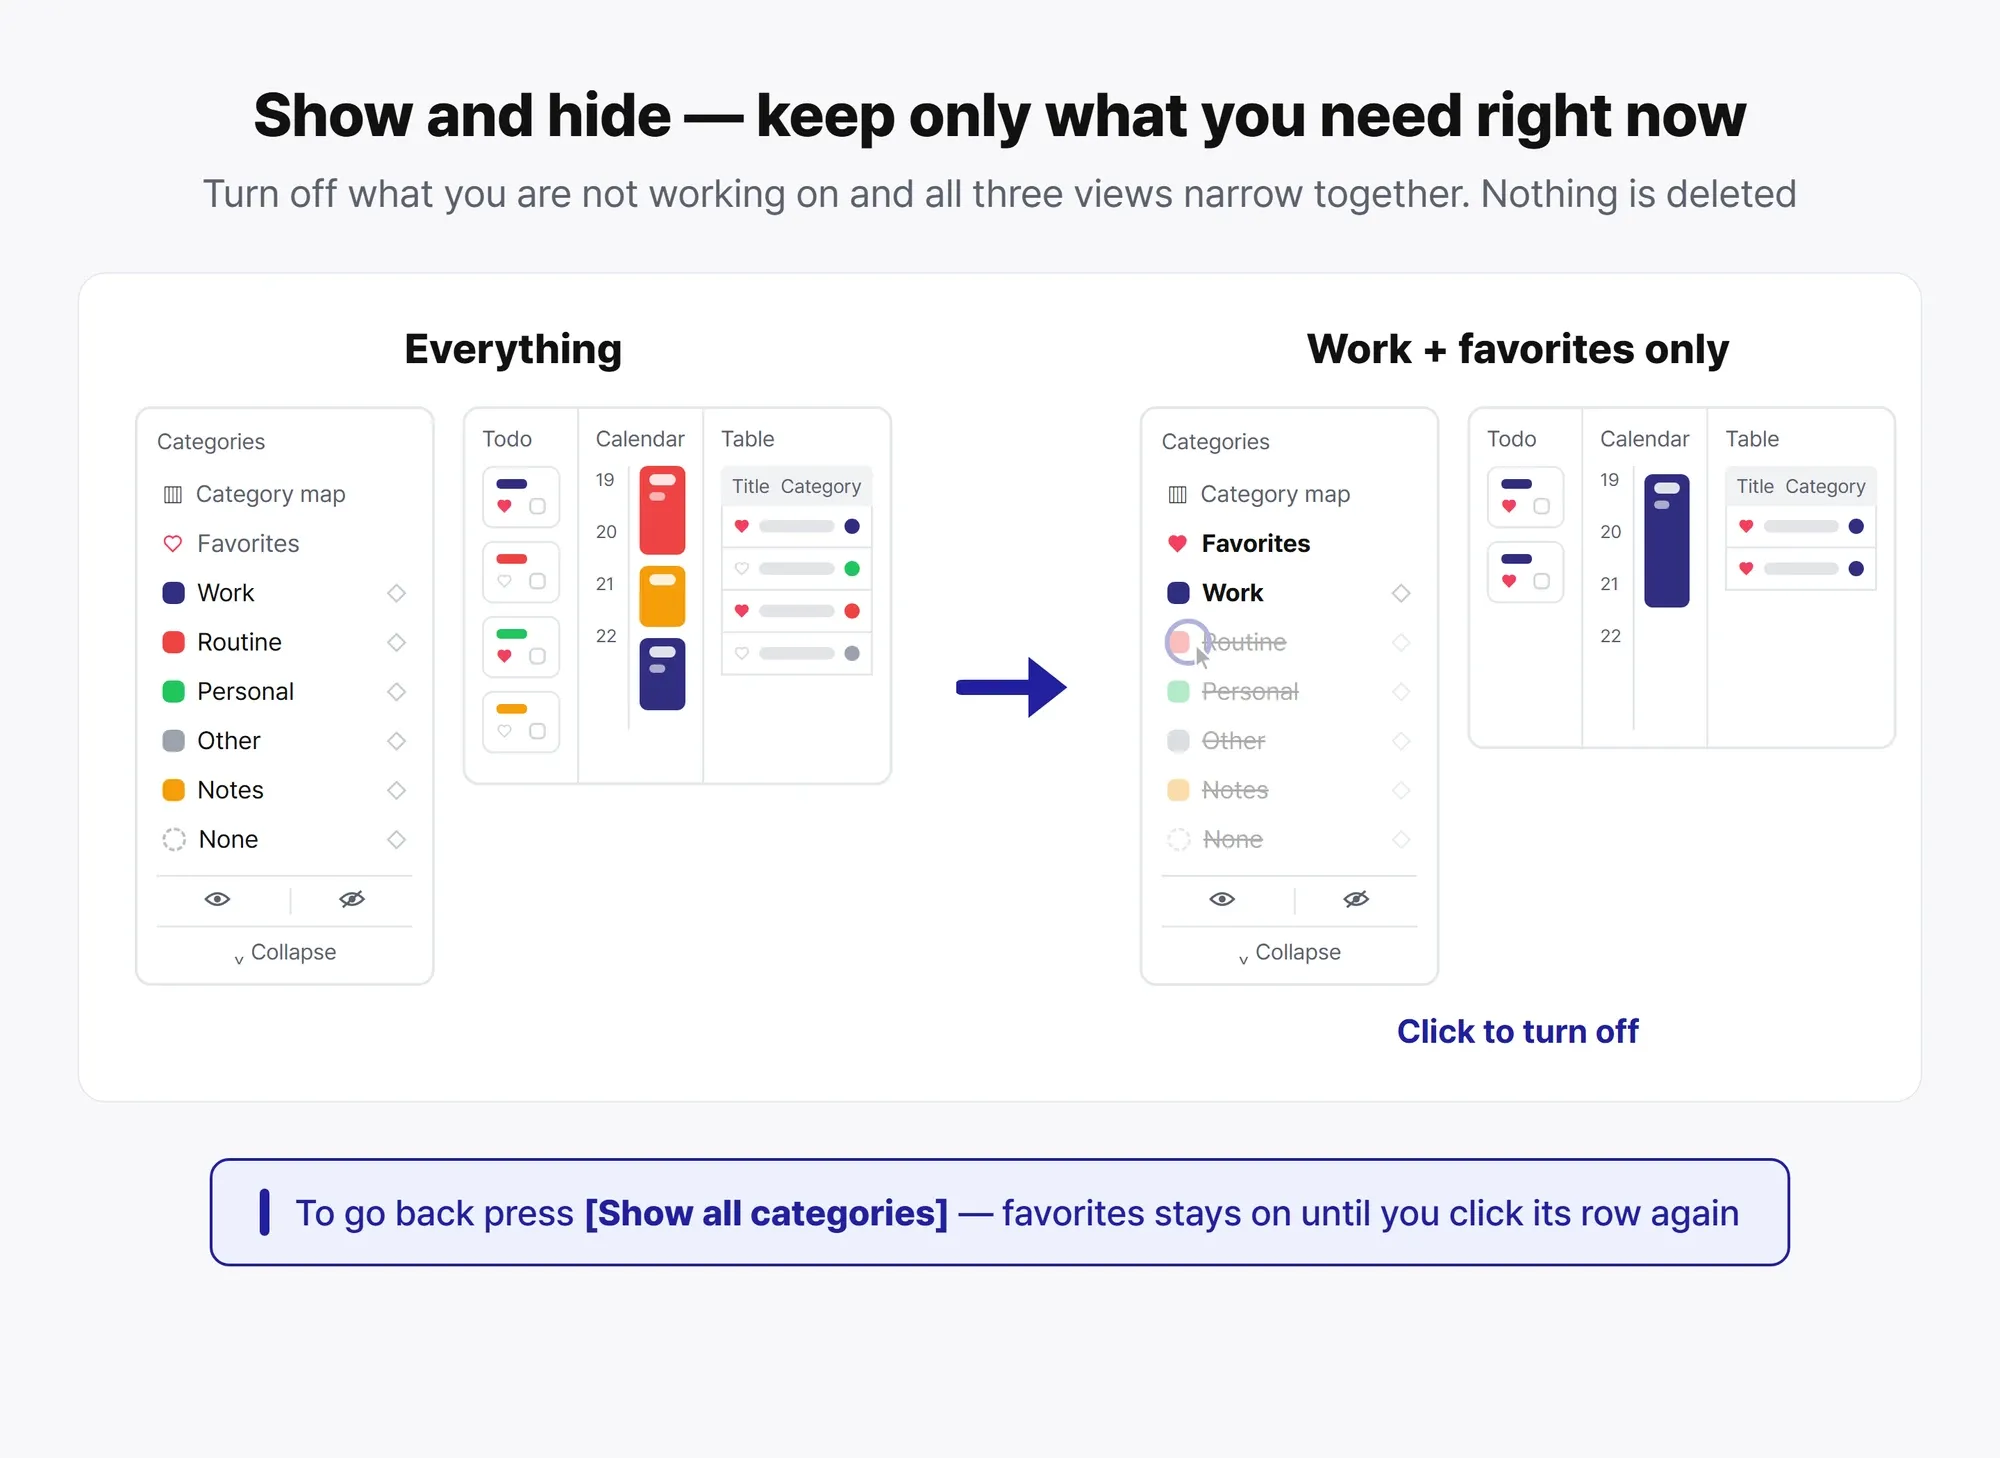
With categories in place, it’s time to choose what you see. In the sidebar you can toggle categories on and off as you like, and the change lands in all three views instantly — Calendar, Todo, or Table, you see only the information you want. Work hours, work only; weekends, life only — nothing is deleted, and toggling a category back on brings it all right back, so switch things off with confidence.
Favorites — a drawer for the things you must not lose ❤️
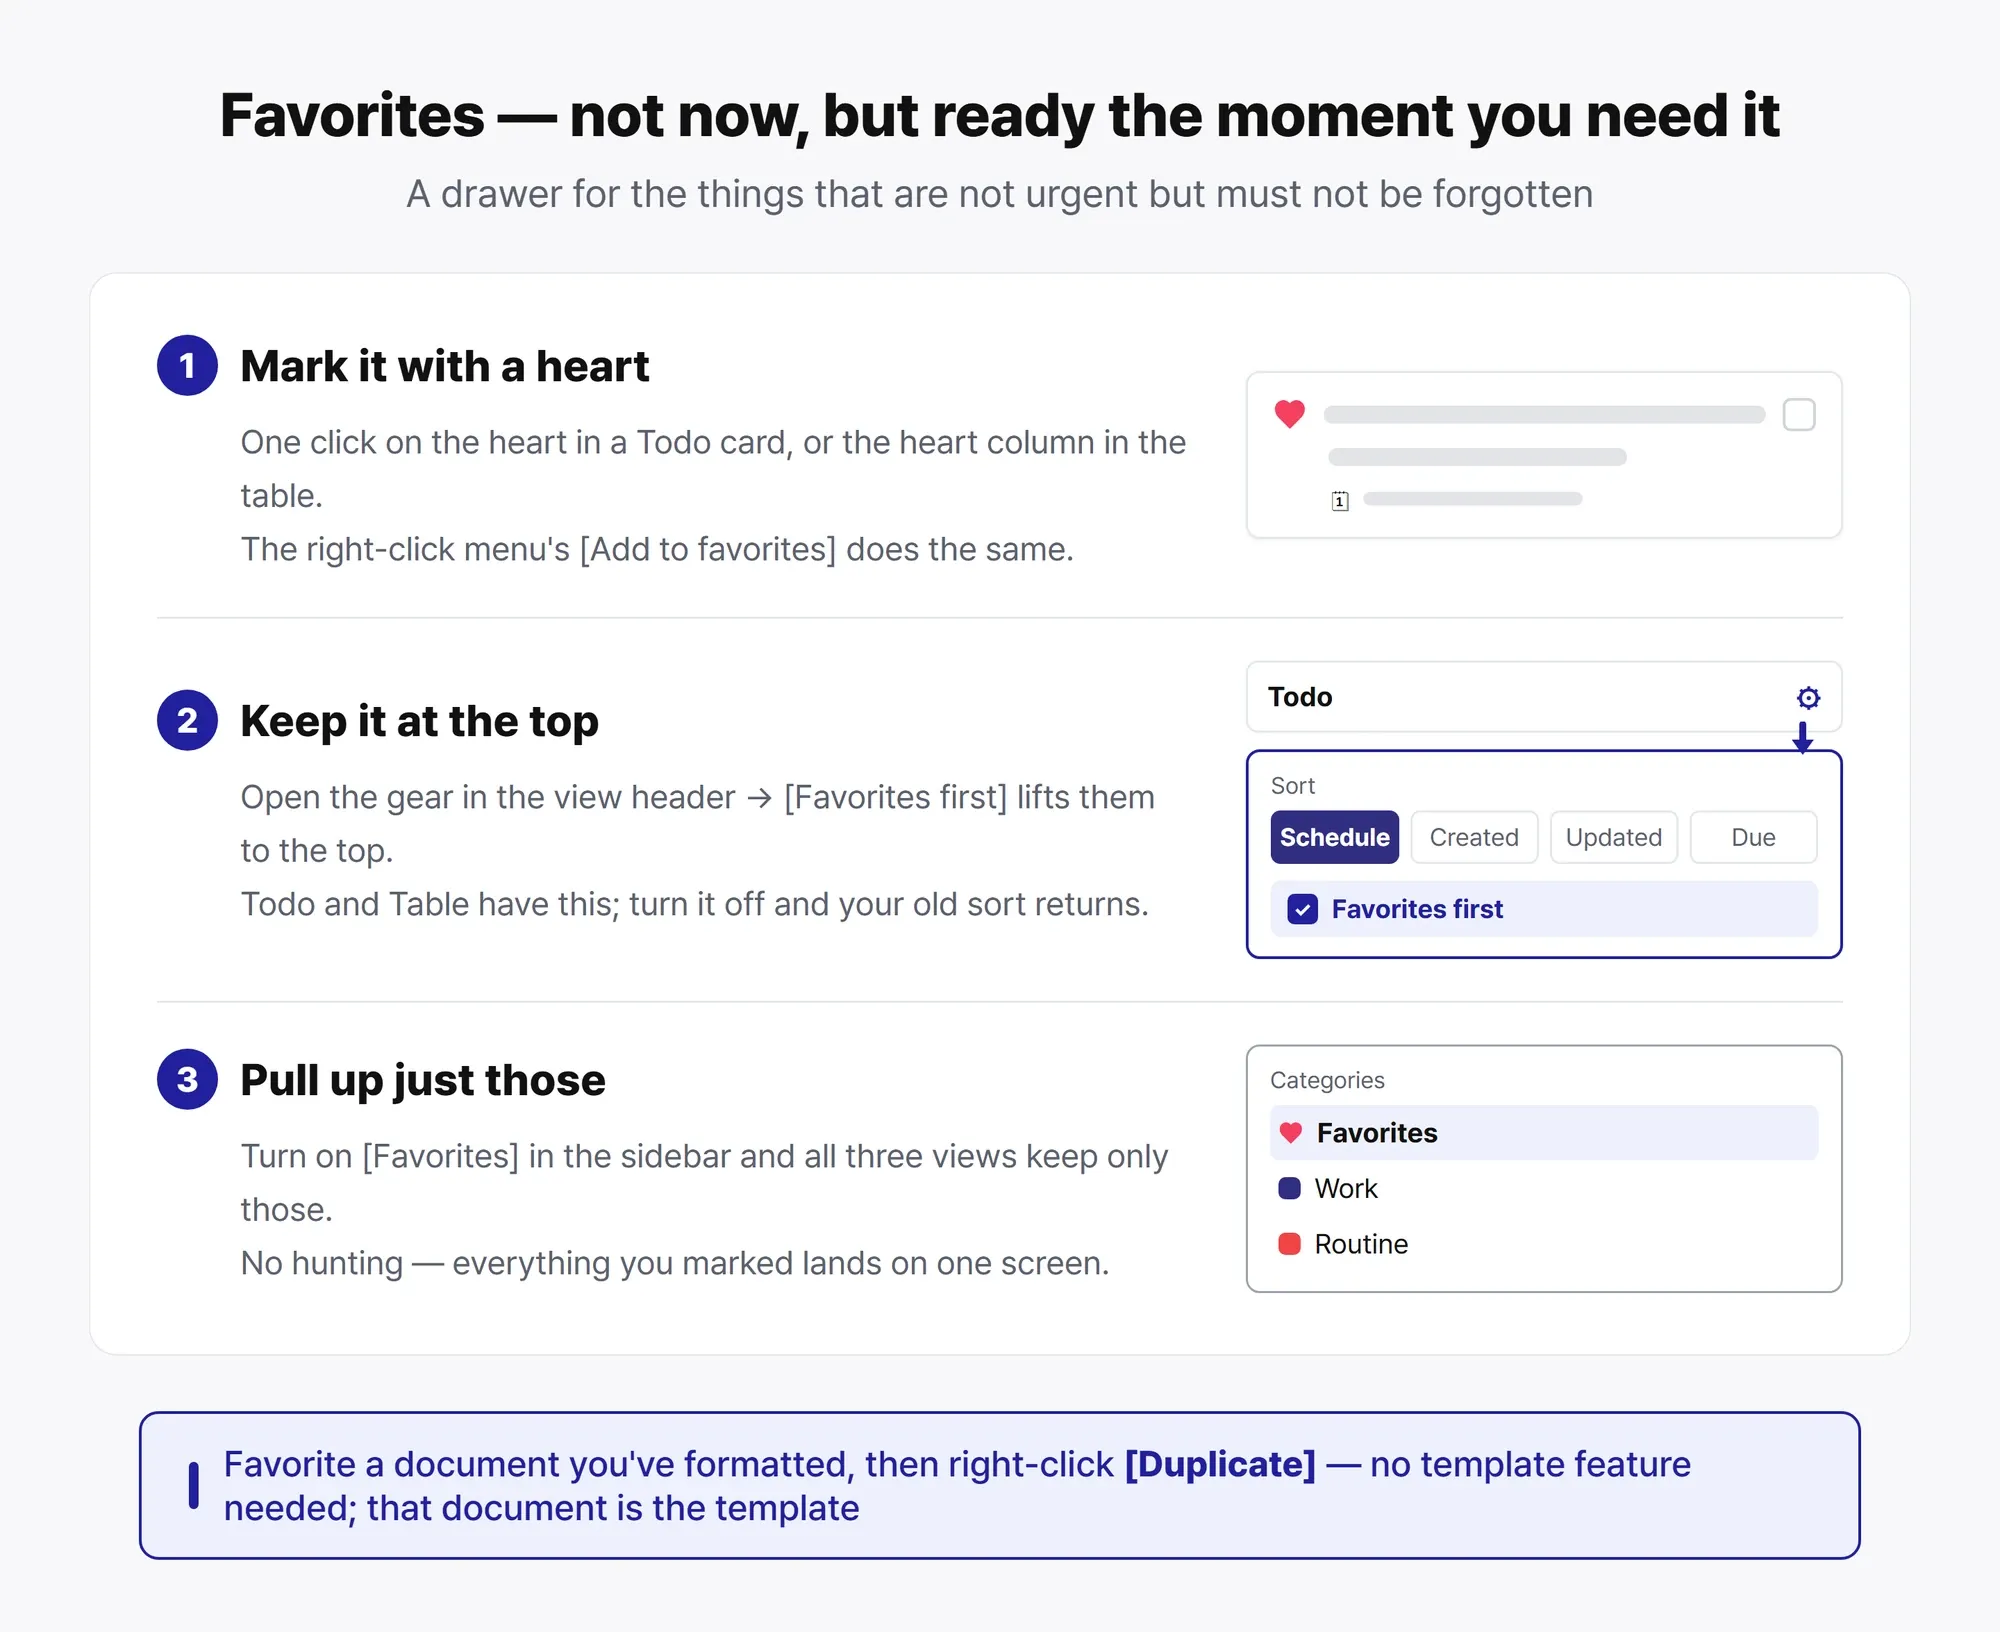
Where do you keep the records that aren’t urgent today but must not slip away? In Syncing, one heart handles it. Mark a record as a favorite and you can reach it two ways: pin favorites to the top (view settings in Todo and Table), or browse only favorites (Favorites in the sidebar). One bonus trick: favorite a document you’ve formatted just the way you like, then right-click → Duplicate whenever you need a copy — no template feature required, because that document is now your template.
Save layout — keep the arrangement you love 💾
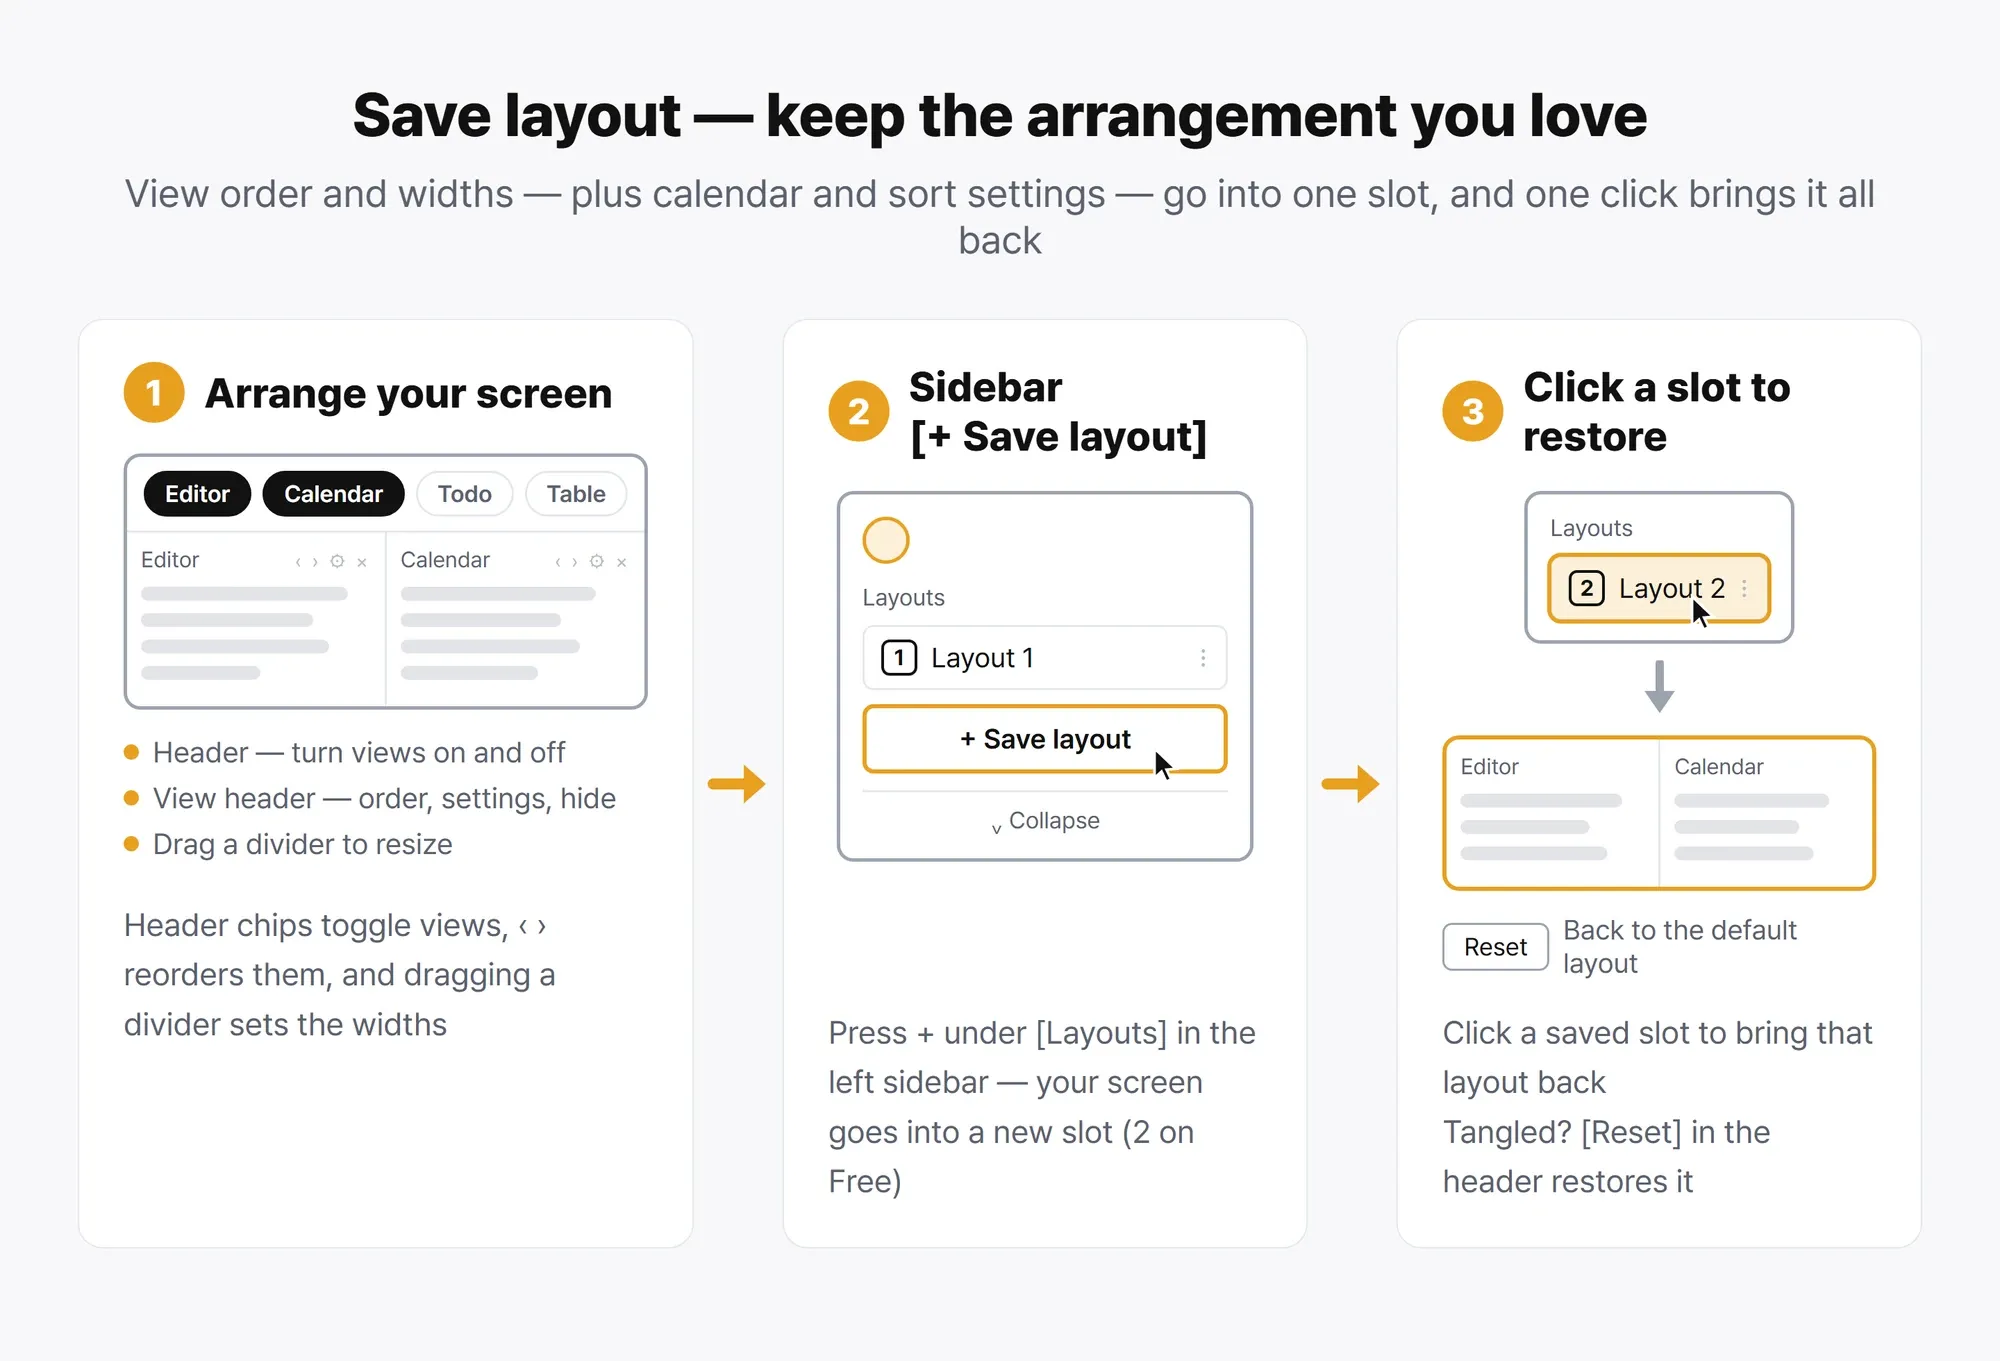
You took real care arranging view order and widths — it would be a shame to lose it all tomorrow. One click of [+ Save layout] in the sidebar stores the current arrangement exactly as it is, including calendar and sorting settings, not just which views are open. Each saved slot can be renamed with a double-click, so we recommend keeping a set for each situation — “Work,” “Focus mode” — and hopping between them with a single click. If the arrangement ever gets tangled, the [Reset] button in the header takes you back to the default screen.
Manage files — every upload in one place 📁
Attach photos and documents for a while and the “where did I upload that file?” moment arrives. When it does, open [📁 Manage files] on the account page. Whether a file arrived as an attachment, was embedded in a record’s body, or was pinned to a comment, every upload shows up on one screen. Search by file name, filter by images or documents, and sort by size, largest first. When storage starts filling up, hunting down the big files here is the most practical way to make room. Pick a file and it shows which record it belongs to — and jumps you straight to that item; photos come with details like resolution and the date taken. And don’t worry about deleting — if a file is embedded in a record’s body, the app warns you first. Syncing’s file manager takes a different path from most note apps: the UI follows patterns you already know, it’s fast, and it doubles as another way into your records — find the file, jump straight into editing.
The keyboard is faster — a few shortcuts ⌨️
You can do quite a lot without ever touching the mouse. The most important is Ctrl+Z — it undoes your last action on any screen (redo is Ctrl+Shift+Z). And the table genuinely behaves like a spreadsheet: arrow keys move between cells, typing starts an edit on the spot, and Enter and Tab carry you to the next cell. Rows copied with Ctrl+C paste cleanly into Excel, and a table copied from Excel pastes right back in. Two more that quickly become habits — Ctrl+D fills a cell with the value above it, and Ctrl+; drops today’s date into a date cell. On heavy data-entry days, these two save you real time. If you’re handy with Excel shortcuts, try them in Syncing too!
Mistakes are fine — undo and the trash ♻️
This is the most reassuring tip of all. Deleted records don’t vanish — they sit in the trash for 30 days before being cleared out, and the [Restore] button brings any of them back at any time. The only truly irreversible act is pressing “Delete permanently” yourself, and the app double-checks before it happens. And if you didn’t delete something but edited it into a mess, there’s a way back too — open [Version history] from the ⋯ menu in the editing canvas to browse the record’s past states in order and return to any point. When you restore, the current state is saved first — so even if you change your mind afterward, you’re covered. So go ahead — poke around, delete things, experiment freely.
Log out on shared computers — take your records with you 🚪
The last tip is less a feature than a habit. If you sign in to Syncing on a shared computer — a library, an office machine — press [Log out] before you leave (it’s in the menu under your avatar). So it can open quickly on any machine, Syncing keeps a copy of your records on that computer, and closing the window doesn’t clear the login or that copy — the next person who opens the browser could see your records. Logging out takes care of three things at once: the copy of your records on that computer is wiped clean, the login ends, and if any changes have not reached the server yet, the app tries to send them first — and checks with you if any are left. Nothing disappears silently. One reassurance to go with it: logging out happens on that computer only. Your phone and your home computer stay signed in, so there’s no need to log out of your own devices every time. And if you ever forget to log out on a shared computer, there’s still a way — [Sign out all other devices] on the account page ends every session except the one you’re using. And that’s all eleven — the only thing left is to make them yours.