
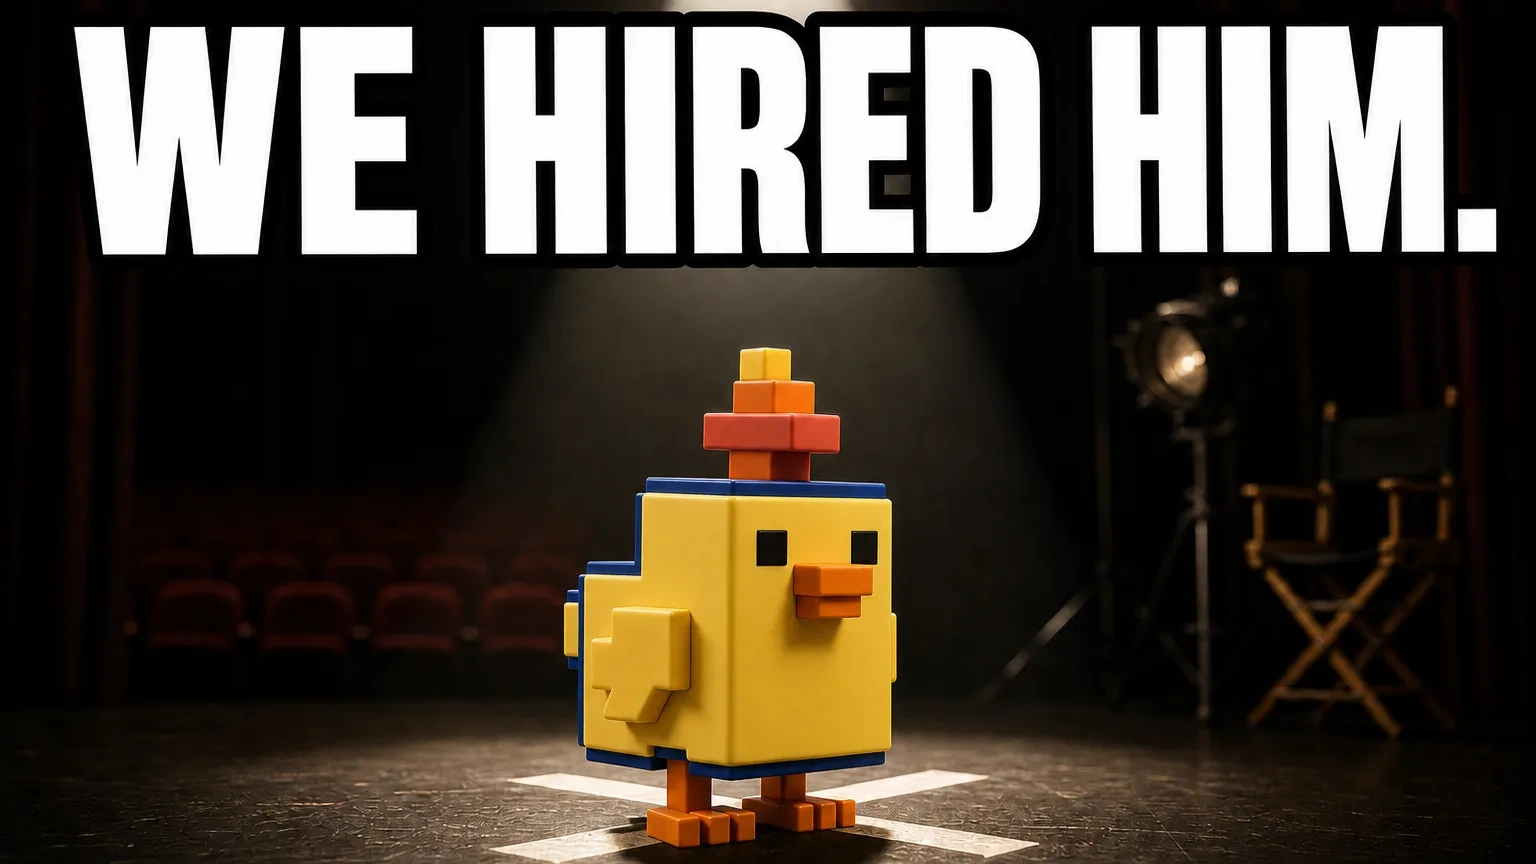
Studios Quote Thousands for a 3-Minute Animation — We Spent $33 on AI
Today, alongside this post, we published a 3-minute-26-second animation on our YouTube channel. It grew out of planning a promo video for Syncing — at some point a question came up: "What if we applied the workflow we use to build Syncing to making videos?" The result is a mini project: a chick built from Minecraft-style blocks going about its day inside our Syncing app — a short film with no dialogue, called "The Little Chick." We figured a character-driven approach would land better than a dry SaaS explainer. It was our first time making anything like this, and we made it with no animation studio and no video editor — just Claude and us. It's not perfect, but for a first attempt at a long-form YouTube video, I'll take it.
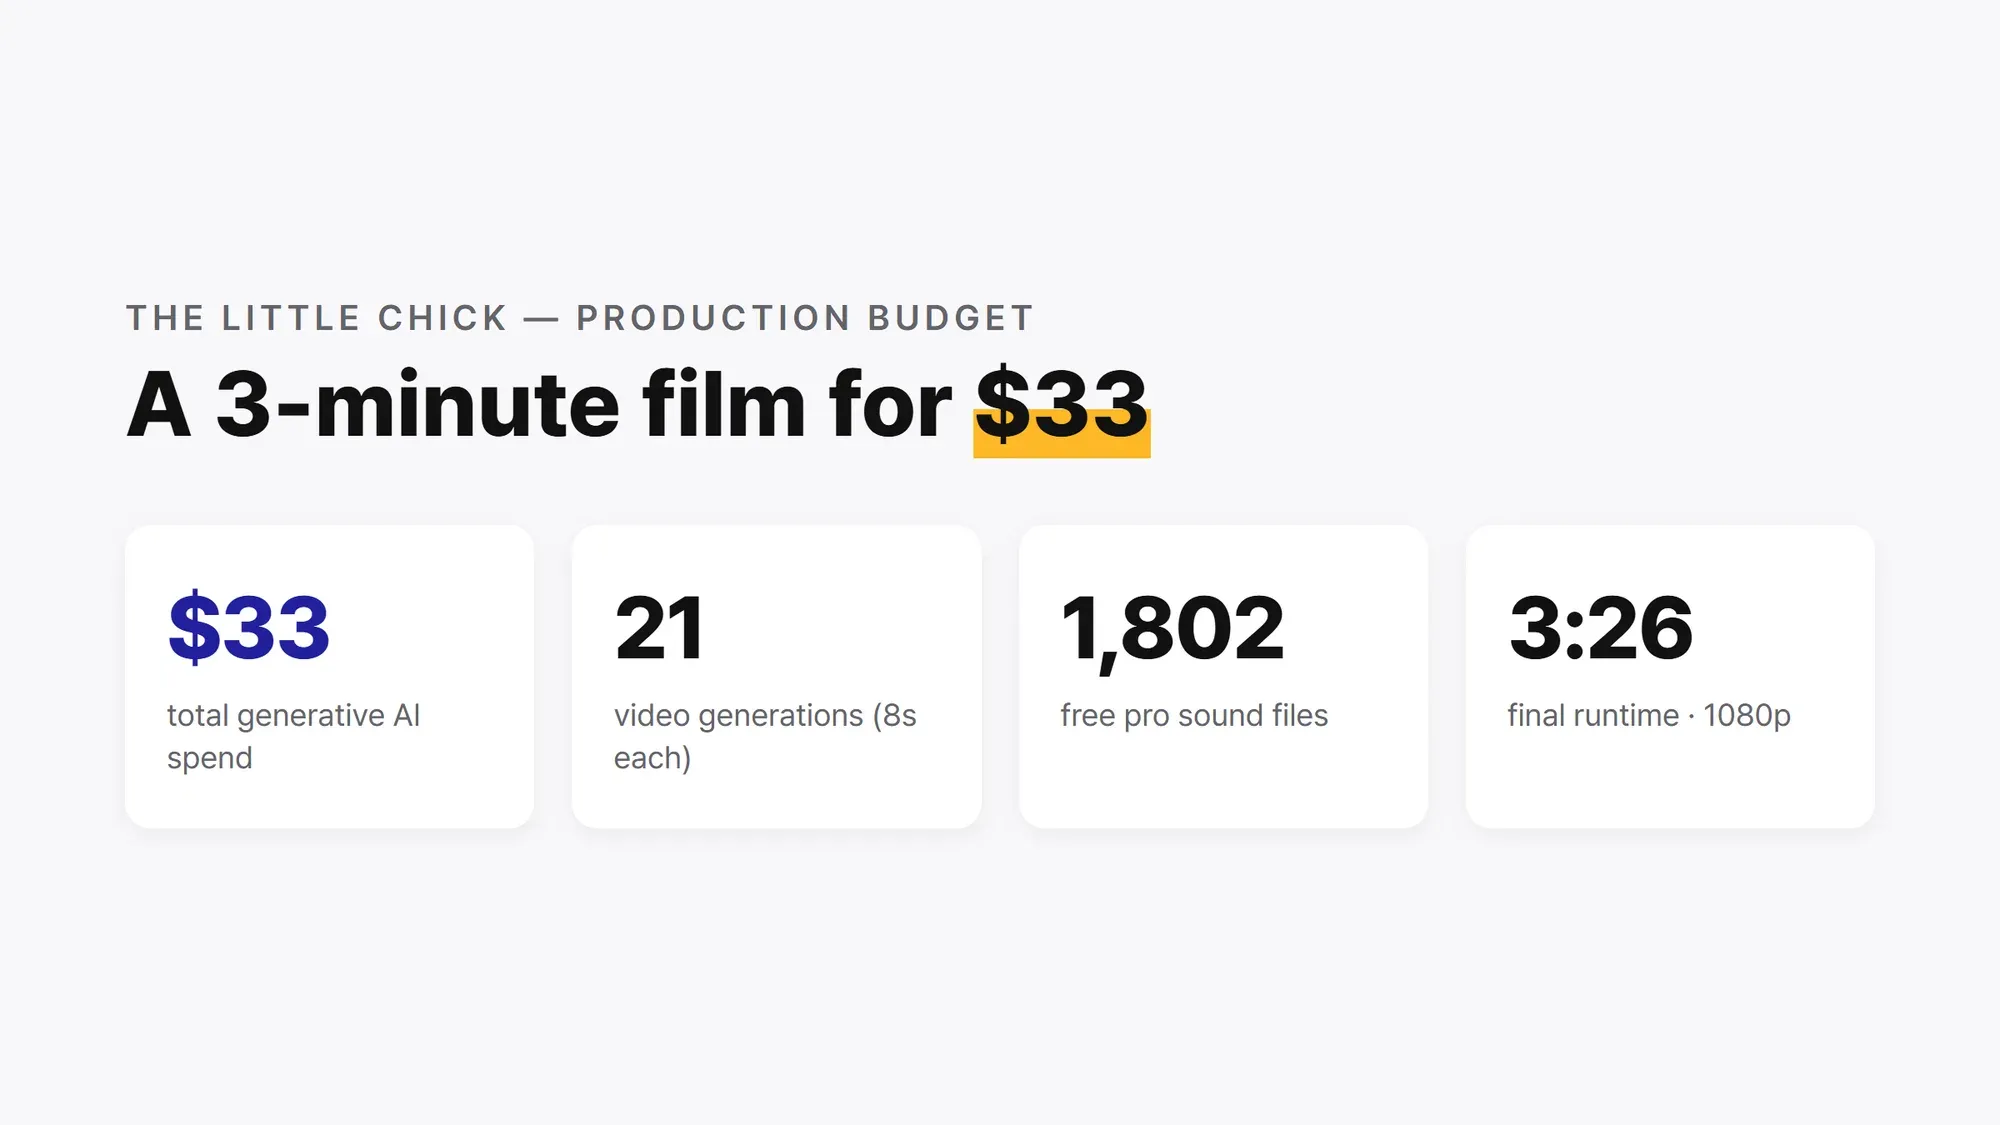
This post is the making-of. The numbers first:
| Final output | 1920×1080 · 30fps · 3:26.6 |
| Production time | 3 work sessions — about a day |
| Generative AI spend | ~$33 ($25.28 measured on fal [video, music, SFX] + ~$8 estimated for images — mostly the “actor performance” clips) |
| Sound effects | 1,802 free professional library files + generation only for sounds the libraries didn’t have (cost included in the $33 above) |
| Music | $0 (YouTube Audio Library) |
| Editing software | None — no Premiere, no CapCut. All code (Remotion) |
| Everything else | The AI subscription we already pay for (Claude · flat monthly) |
| Final stack | Claude Code (AI coding assistant — storyboard, code, review) · Remotion (renders video from React) · Google Veo 3.1 fast (performance clips, via fal) · gpt-image-2 (images, OpenAI) · CassetteAI (SFX generation) · ffmpeg (chroma key) · YouTube Audio Library (music) |
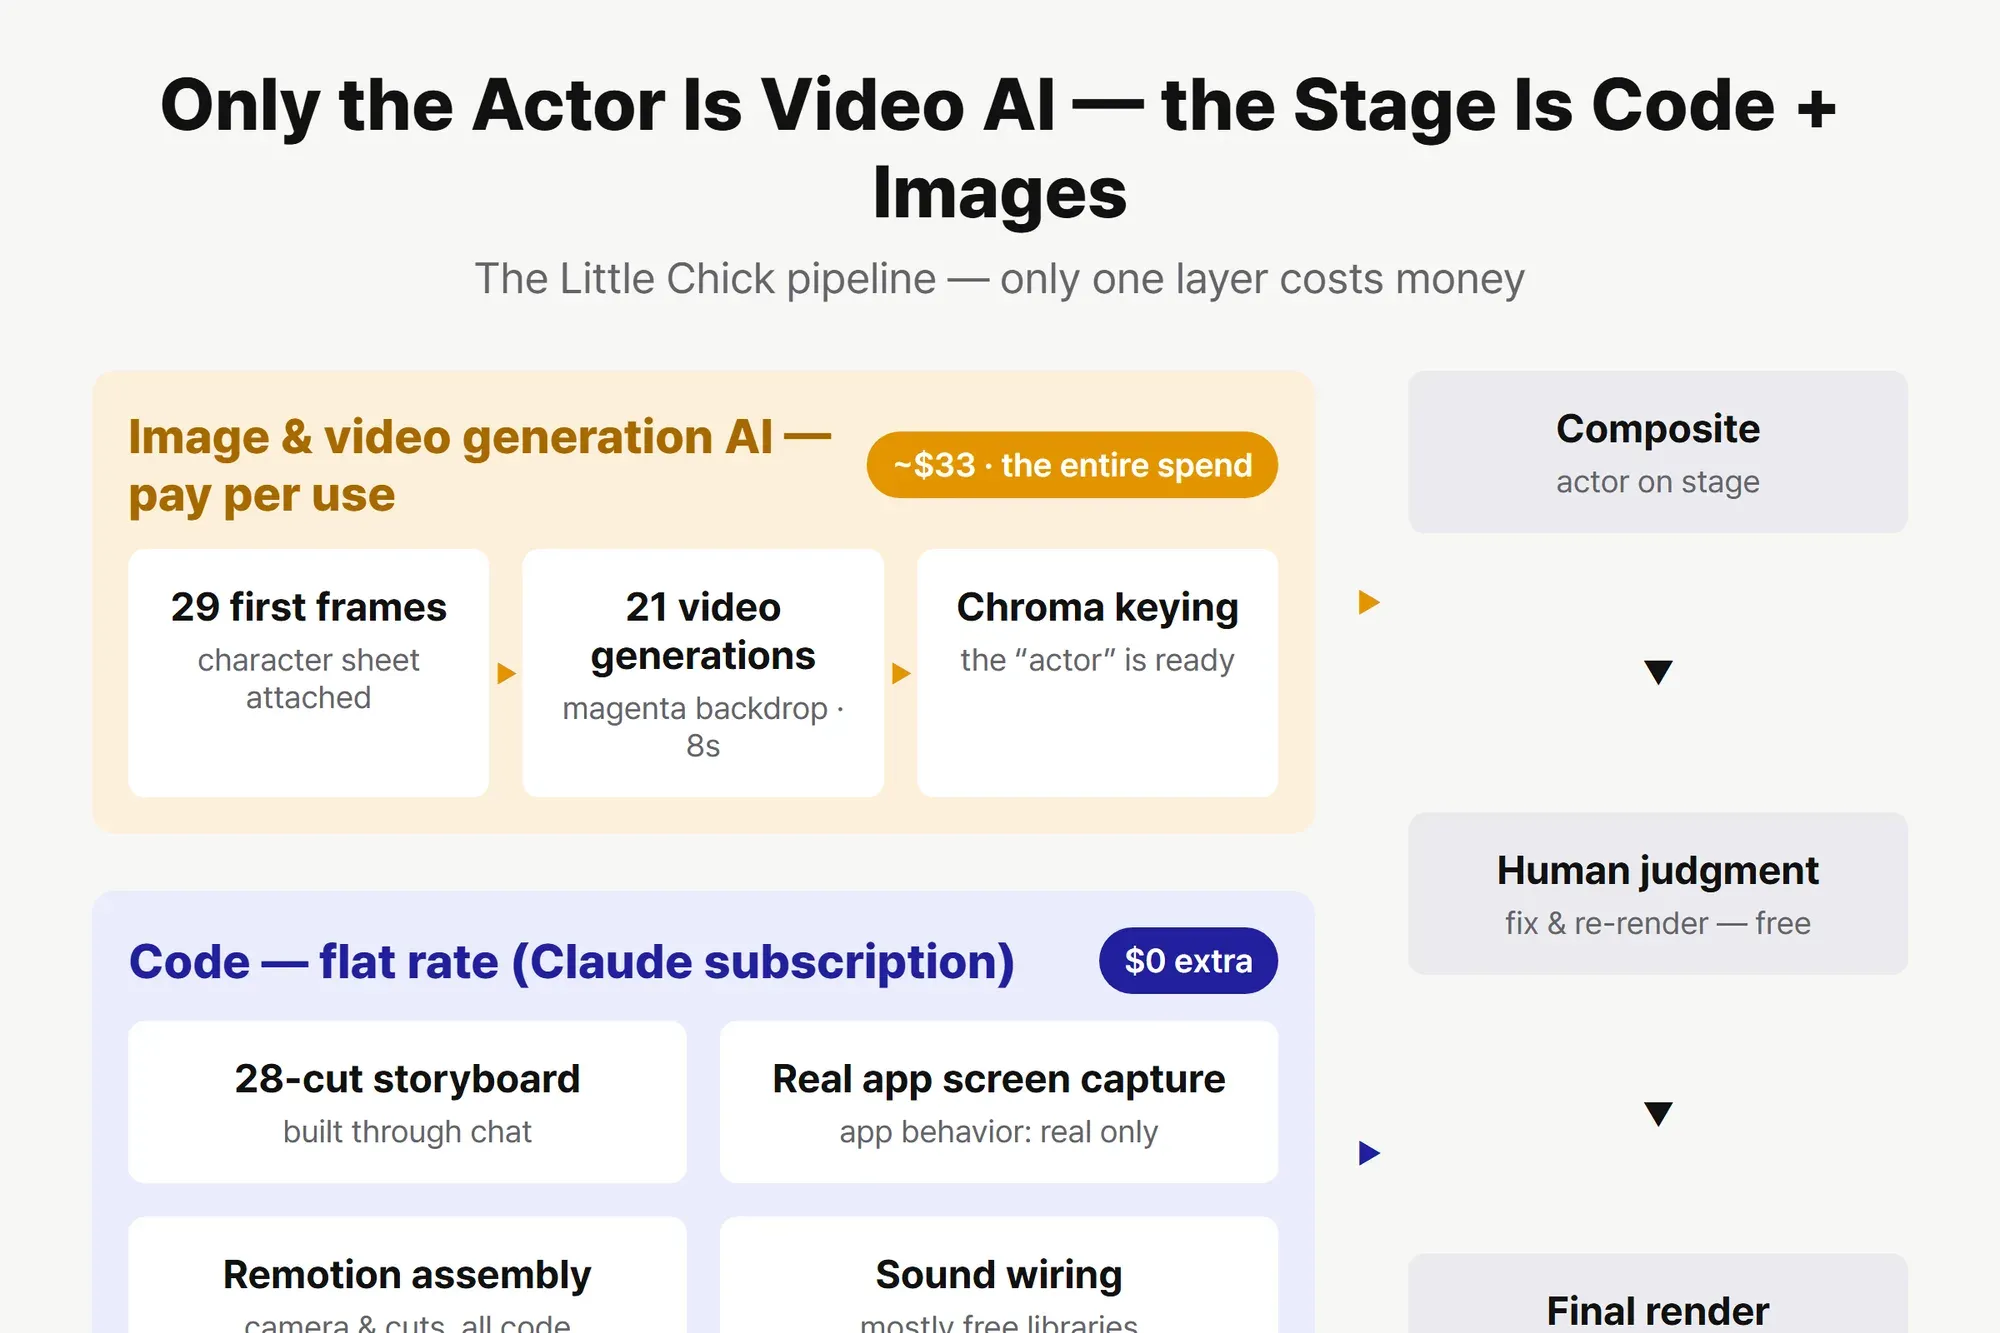
The “everything else” row is the heart of this post. The real budget of this film wasn’t decided by “how much generative AI we used,” but by “what we chose not to generate and solved with code instead.”
The Idea — Only the Actor Is AI; the Stage Is Code + Images
When people think of making videos with AI, they usually picture text-to-video tools — Sora, Google Veo, Seedance. We looked at finishing the whole film with those tools alone, and the verdict was no.
“Why not just generate the whole thing in one go?” — Three reasons made it hard. More precisely: even if you somehow could, you’d be worse off.
First, even “long” AI videos aren’t actually generated in one piece. As of this writing, video models generate roughly 8–15 seconds per call — Google Veo, which we used, gives 8 seconds per generation. Yes, some tools offer an “extend” feature that produces minutes-long videos. But look inside and it’s chained generation: the last frame of one clip seeds the next. Someone is always stitching short clips together — the only question is whether the tool does the stitching or you do.
Second, hand the stitching to the tool, and keeping your character consistent gets hard. Seeding each clip with the previous clip’s last frame is like making a copy of a copy: appearance, lighting, and props drift a little with every link. The moment consistency breaks, there is no character. We went the opposite way — every cut restarts from the character’s reference images — so the drift resets to zero every 8 seconds, and the same chick appears throughout the final film.
Third, the blast radius of failure is different — and so is the bill. Generate the whole thing at once, and you’re cramming cuts, camera moves, and timing into one prompt paragraph; if anything is off, you’re re-rolling the entire video. At $1–2 per 8-second clip, three minutes is tens of dollars — again, for every revision. Keep the units short, and a failure stays contained in one clip. We did have failures, and none of them cost more than a single cut — the details come later.
These three points aren’t guesses; they’re tuition we paid. Before this film, we paid it twice with shorts: one we generated as a single continuous draft — the visuals were great, but stray garbled text in other languages kept appearing on screen, and the only way to fix a seam was “re-roll everything,” so we shelved it. The next one we split into scenes — and this time the character looked slightly different in every scene. This film’s pipeline — 8-second units, plus reference images on every cut — is the answer that came out of those two failures.
We took the model’s 8-second limit and adopted it as our unit of work.
Then we flipped the movie-VFX playbook and brought it to AI video. Film sets shoot the actor in front of a green screen and composite the background in CG. We did the reverse:
- Only the actor (the chick’s performance) comes from generative AI — shot against a solid-color backdrop, in short 8-second takes.
- Stage, camera, lighting, timing, captions, and sound placement are all code — using Remotion, a tool that makes video from React; think of it as a video editor you operate by writing code. Where the stage needed extra scenery, we used generated images.
- Most of the stage is real app screen captures — more on why in the next chapter.
This division of labor changes the cost structure. Generated video costs money by the second; code re-renders for free, as many times as you like. And the labor of writing that code is done by Claude Code, an AI coding tool — its cost is the monthly subscription we were already paying. Push the pay-per-use side (generation) to the minimum, and pile the work onto the flat-rate side (code). That’s the whole method.
To put it in film-set terms:
| On a film set | In this production |
|---|---|
| Actor | Generative AI (Google Veo) — 8 seconds of acting at a time |
| Stage sets | Real app screen captures + generated background images |
| Camera, lighting, editing | Remotion code |
| Director — every call, final say | A human. That’s me |
The only row in that table that charges an appearance fee is the actor.
One more thing, though — before any of this cost talk, there was a line we drew first. That’s the next chapter.
Why We Didn’t Go 100% Generative — Reasons That Outrank Money
If cost were the only concern, “100% generated” would have been on the table. But this film goes on our product channel, and there are two lines that, once crossed, money can’t buy back.
First, the false-advertising line. Image and video models are very good at drawing “plausible app screens” — buttons that don’t exist, features we never built, layouts that aren’t real, all blended in naturally. The moment such a screen appears in a product video, it stops being staging and becomes a false representation. Platform policy draws the same line — YouTube’s enforcement isn’t about “is it exaggerated?” but “does the video deliver what it promised?” We saw this firsthand: in a thumbnail experiment where we gave a generative model free rein, it drew a fake app UI and even invented an app name. The model knows what sells; it doesn’t know our product.
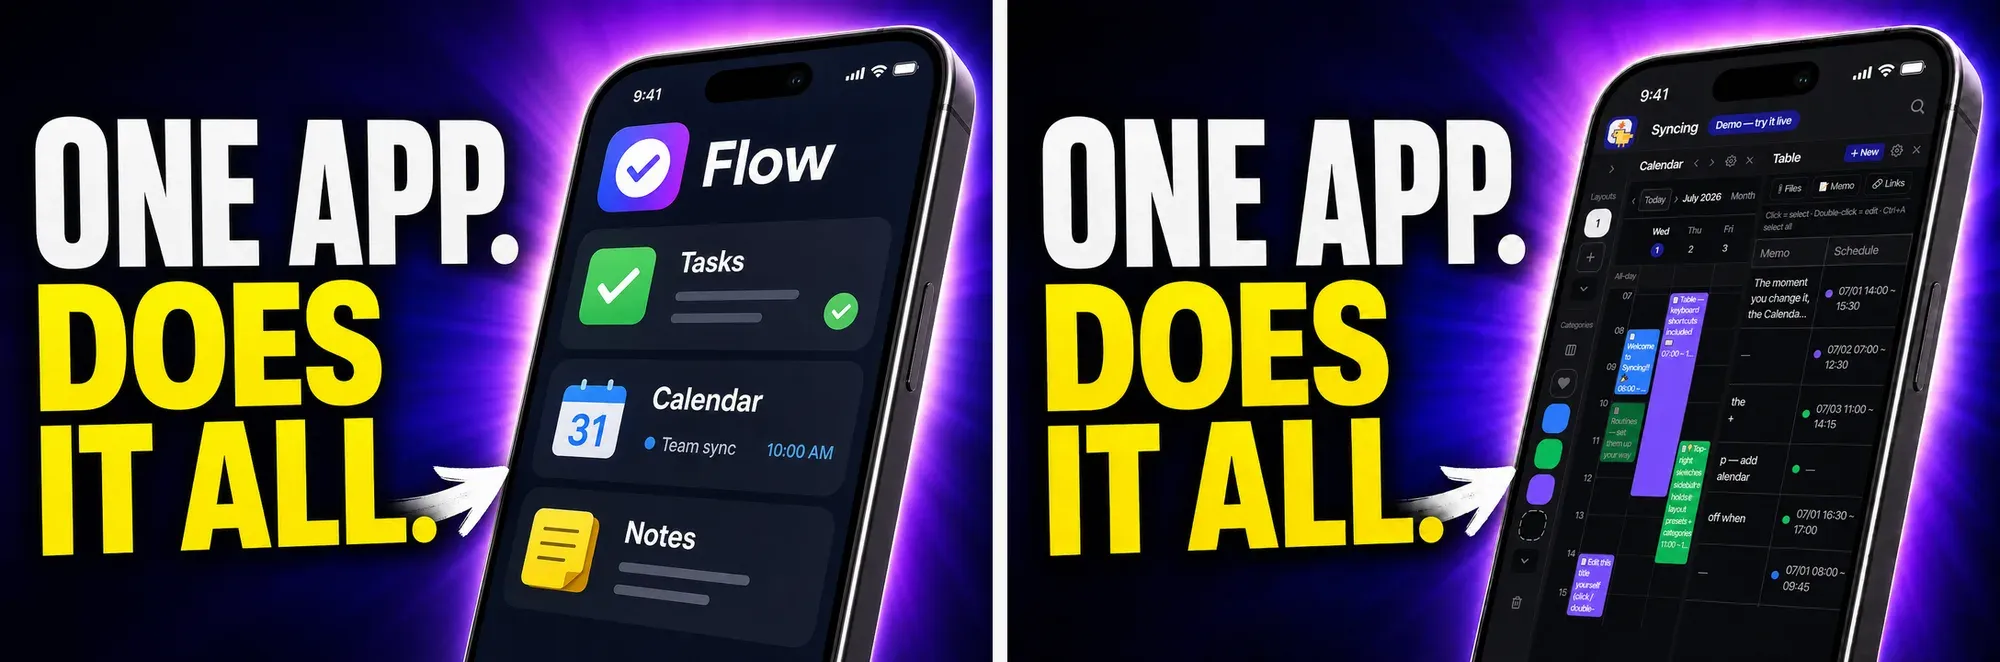
Second, the misinformation line. Viewers learn the product from what’s on screen. Inaccurate details in a generated screen — menu positions, interaction order, what happens on click — teach users the wrong way to use the app, and curdle into feeling misled when the real app doesn’t match. That’s not a marketing problem; it’s a product-trust problem.
So before writing a single storyboard panel, we drew the defense line: “App behavior appears only as real screen captures.” Generative AI never touches the app screens; it only plays the actor. Everything the app does in this film was captured by screen-recording the actual app.
Bottom line: the boundary of “how far does generative AI go” is drawn by honesty first, before budget ever gets a say. Cost optimization happens inside that line.
Pre-Production — the Storyboard Is Half the Work. Claude Is the Brain and the Planner.
That was the design story; now for how we actually built it, in order. The work took three chat sessions — about a day of actual work. The first session never touched principal photography. It did two things instead.
Pipeline validation. To confirm that “generate only the character’s performance, key it out, and do backgrounds and camera in code” actually works, we ran several AI agents in parallel to survey industry practice and official docs — and — crucially — ran a pre-flight test for about two dollars: three first-frames in the three candidate key colors (green/blue/magenta) → one 8-second performance clip → chroma keying → composite over an app screen. One full pass through the pipeline at minimal cost, confirming “this process holds” with real artifacts, before any real spending. Putting your assumptions on trial for pocket change before spending big — that’s the first lesson of ultra-low-budget production.
The storyboard. The starting concept was “like an old silent film, no dialogue.” The finished film doesn’t implement that grammar textbook-style — the point is that’s where the idea started. The way we worked was conversation, start to finish. I tell Claude the direction, a storyboard draft comes back, I answer scene by scene — “keep this,” “change that” — and a revised draft comes back. The storyboard went through two full passes this way — and in fact, every “we fixed,” “we decided” in this post refers to exactly this kind of chat round-trip.
That’s how the skeleton came together: the opening where the chick mistakes the editor pane for a pond and dives in, the scene where it climbs a staircase of blocks to complete the title card. And the defense line (“real captures only for app behavior”) sat as the first line of the storyboard, the first test every cut had to pass.
Of course, we had also pre-wired the plumbing so Claude could freely call paid models on fal, or OpenAI’s gpt-image-2, through skills — procedure files we built ourselves on top of extensive agent research. So Claude is the brain that actually commands and operates the tools and agents, and my job was to communicate in free-form conversation: steering, adjusting, deciding.
Chroma Key — Borrowing a Broadcast Trick for AI Video Assembly
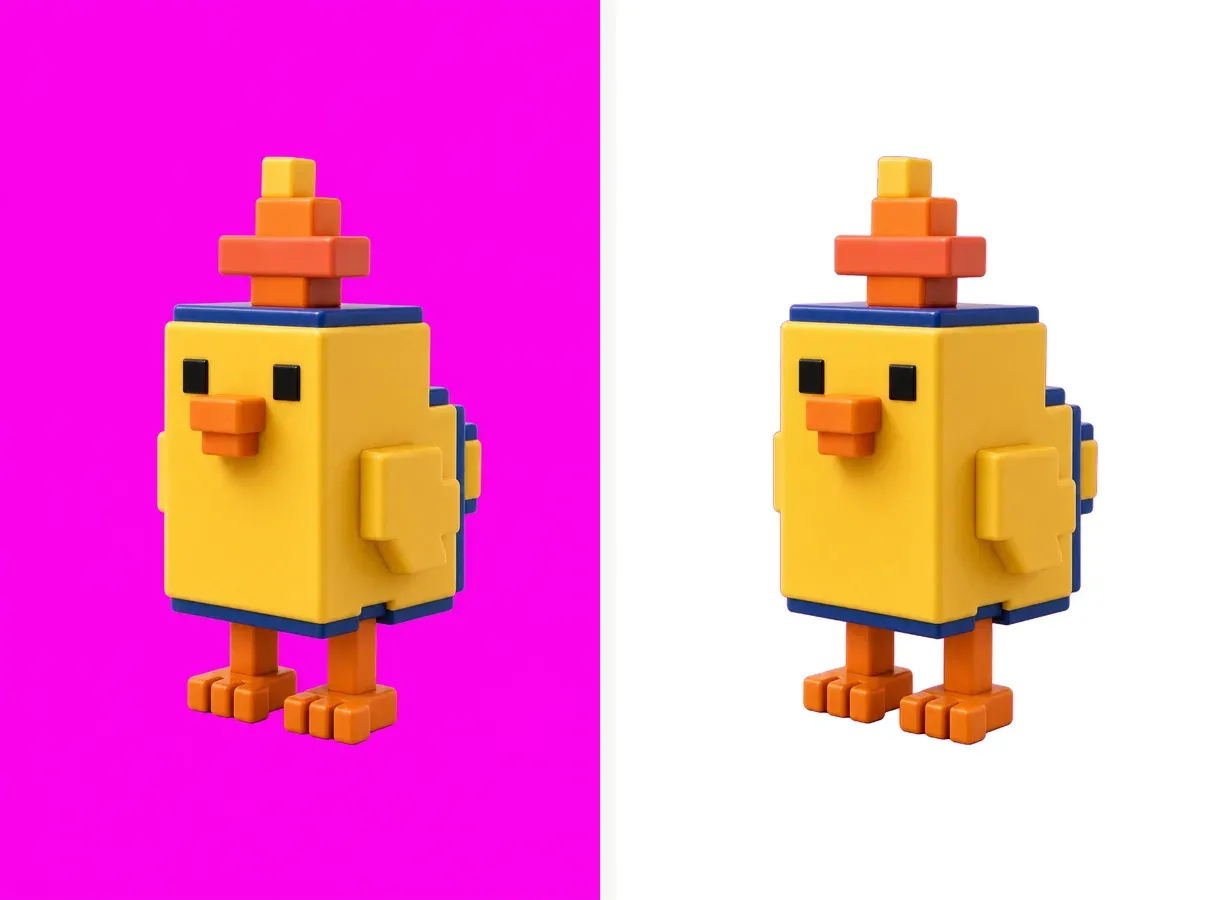
Chroma key is the technique you see in livestreams all the time — a streamer sits in front of a green screen, the background vanishes, and only the person remains over the gameplay. The central move of this production was bringing that video-editing technique into the assembly of AI-generated video: have the chick act in front of a solid-color backdrop, erase just that color, and lay the “actor” over real app screens.
The one non-standard choice was the color. Our chick has a yellow body with navy trim, so in theory both green (yellow contains green) and blue (the navy) were risky. Then the pre-flight test measured all three — and in still images, all three keyed cleanly. The final pick was magenta — because in video, where compression smears color boundaries, it has the most headroom: the color farthest from anything on the character (ffmpeg chroma key · similarity 0.18 / blend 0.14). The lesson: key color is decided by your character’s palette, not by convention — and passing on stills doesn’t guarantee passing on video. We wrote down every number we settled on here — what that record turned into comes at the end of this post.
The Shoot — This Is Where the Money Goes
The shoot has two stages.
First-frame images. For each performance cut, we generate the still image it starts from. We used gpt-image-2 on the high-quality setting — roughly $0.20–0.30 per image, and under a cent on the low setting. Any image model, like Nano Banana (Gemini), can do this stage. The crucial part: attach the character reference set to every single generation — the character’s 3D reference render and the turnaround (front/side/back). That’s what keeps the same chick showing up cut after cut. With prompt text alone, the character will drift, guaranteed, as the cuts pile up.
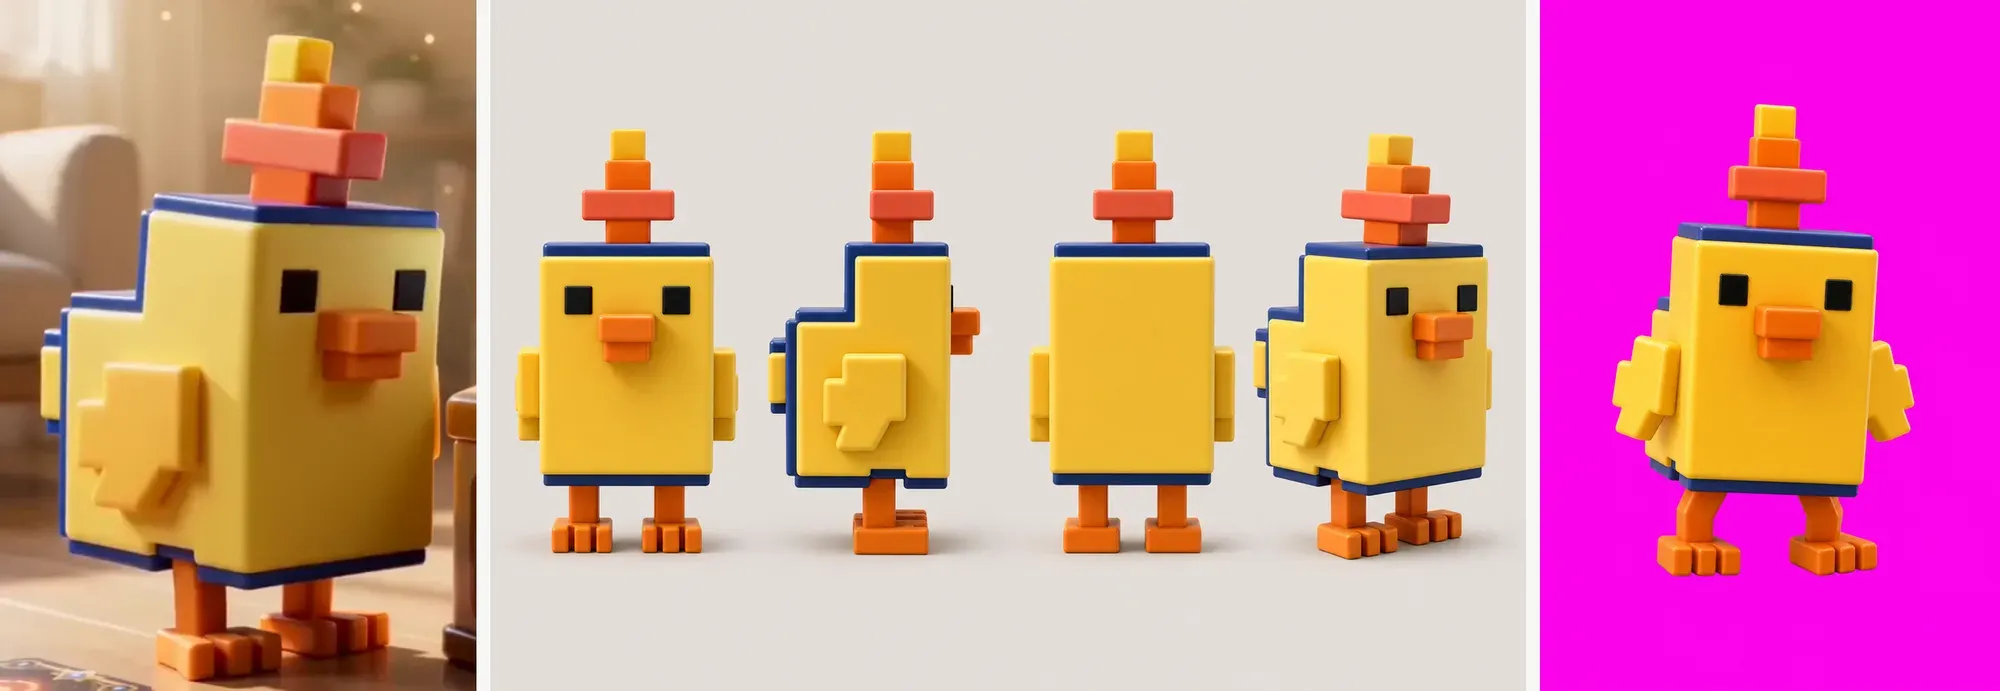
Image-to-video generation. Feed an approved first frame to the model with acting directions and get an 8-second clip back (Google Veo 3.1 fast — image-to-video mode, where the model only animates what you give it). Three-quarters of the total spend went here — 21 video generations (1 pre-flight + 20 for the film, retries included). According to the auto-recorded generation log, this film used 62 API calls in a single day — 21 video, 29 images, 2 music, 10 SFX (batched calls; the actual sound count is in the dozens). Everything except video adds up to about nine dollars — a quarter of the total.
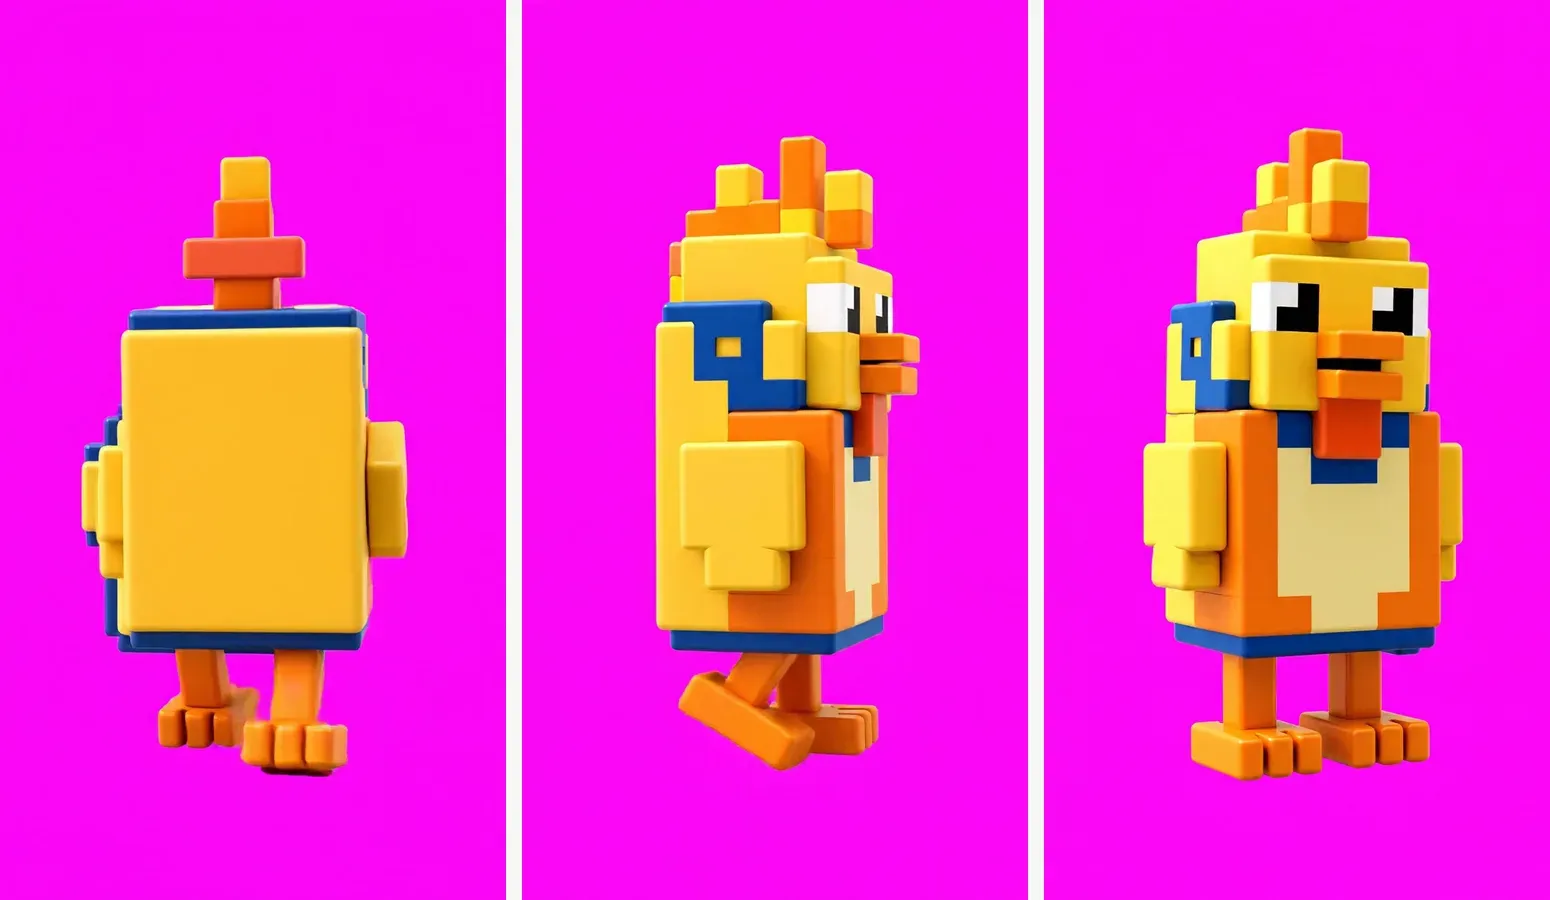
<Three performance clips, as generated — 8 seconds each against magenta. This is what goes into the chroma key>
We also sequenced generation to cap our downside — instead of firing everything at once, we test-generated five clips first to see how the model handles this character’s movement, then proceeded with the rest.
The Review Trap — Never Approve from Freeze-Frames Alone
This is where we got burned. We reviewed every generated clip as a frame strip (a grid of frames sampled from the video) and passed them all — then, in actual playback, two clips morphed into a completely different creature between the sampled frames, and I only caught it when I finally watched them play. A strip cannot see between its frames.
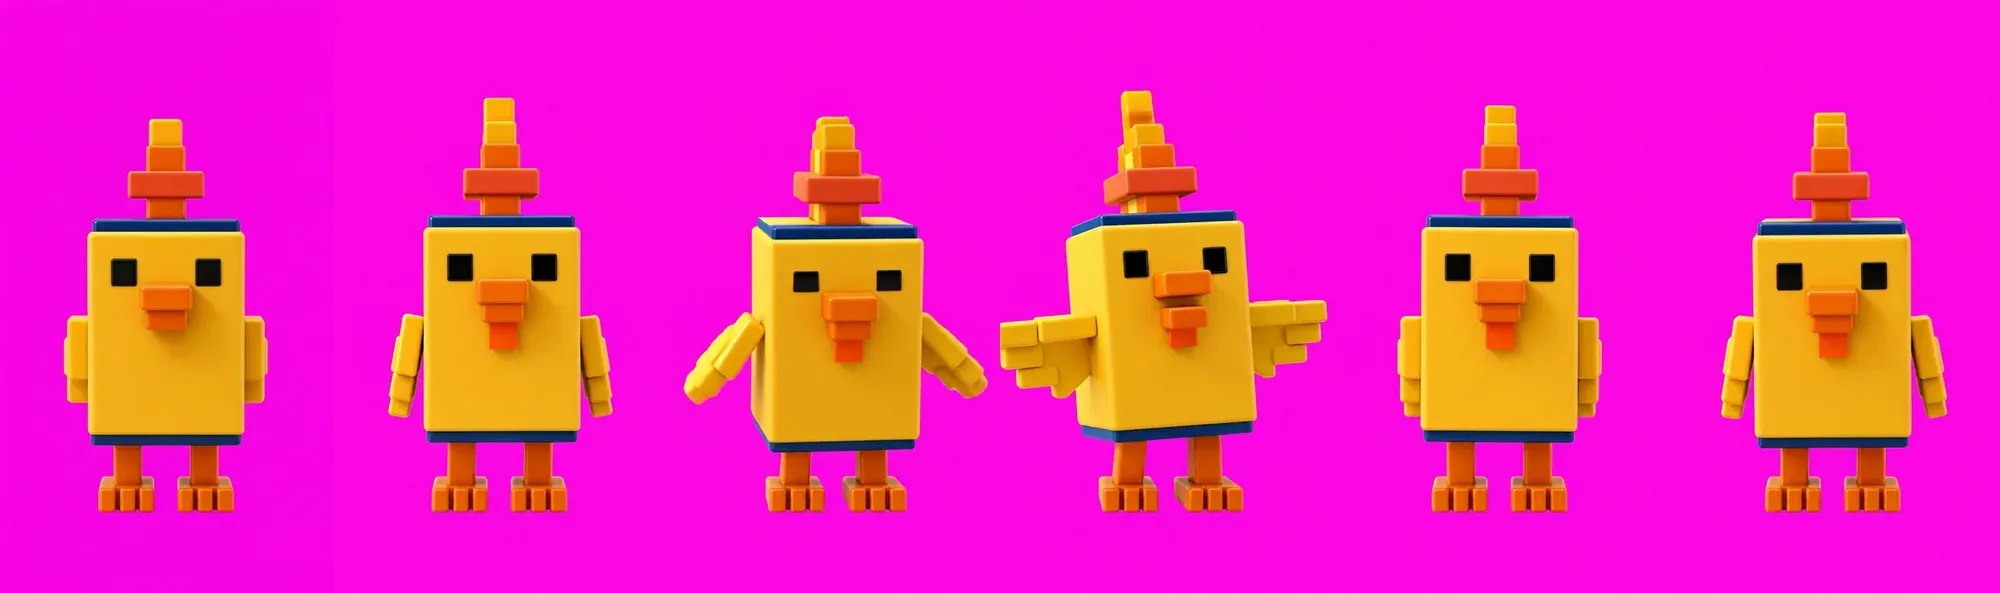
For those two cuts we skipped regeneration and worked around it with an approved still + code-driven staging (a figure walking away into the distance reads perfectly well as a still animated by code). The second lesson of ultra-low-budget production: don’t fight a failed generation with another generation — route around it with code when you can. Regeneration costs money; with a subscription, code costs nothing extra.
Stage Assembly Is All Code — Editing Without an Editor
The shot list is 28 cuts. Only some of them contain a generated performance clip; the rest are built purely from app screens, stills, and code-driven staging — which is how 21 generations become 28 cuts. The stage had three ingredients: real app screen captures (the rule), generated background images (scenes outside the app, like summer skies and sunsets), and the Remotion code that sets them all in motion. Over real app captures we lay the chroma plates (the transparent-background chick performances), and everything else is directed in code: camera push-ins and pans, iris wipes (that circular closing shutter from silent films), a sunset-to-night-to-sunrise timelapse, even a fall from the flat screen into 3D space.

The power of code-driven direction is that revisions are free. “Have the chick enter 0.3 seconds later” is a one-number change; the sunset timelapse is one function mapping time to sky color. This film shrank twice — from a 6-minute plan to 4:21, then to the final 3:26.6; the outro was redesigned wholesale (space workout → behind-the-scenes reel + credits); the fall was re-angled to exit the frame completely; the seams between cuts were hidden with silent-film-style ‘blink’ transitions — a slow eyes-shut, eyes-open beat that masks the cut — all of it was code edits and re-renders, with zero additional spend.
The Sound War — the One Front Where Generative AI Collapsed
This is the part I owe you the most honesty about. Telling an AI to make sound from text failed completely at anything that has to sound musical. We laid down 47 generated sound effects, played them back, and to my ears it was grating — painful to listen to. We auditioned 12 candidates for the opening sound; every one failed. Regenerating was not converging on an answer.
One caveat: this may not be purely the tools’ fault. We have no music or sound-design background, so we lacked the vocabulary to order the sounds we wanted. A sound designer prompting with precise terms might have gotten different results. The most we can claim is this: describing sounds in layman’s terms doesn’t produce usable quality.
Along the way, we even tried synthesizing instrument tones directly in Python code — free, but it was all discarded in the “full sound overhaul.” Free is worthless if it doesn’t pass the ear test.
What survived was two layers:
- Free professional libraries — the Sonniss GDC bundles (pro-quality packs the Game Developers Conference gives away, commercial use OK) + Kōka-on Lab (効果音ラボ, a classic Japanese SFX site with a cartoon-friendly touch) + Kenney (CC0). Together: a searchable sound vault of 1,802 files, all free — and we swapped out twenty awkward sounds for pro sources found there. Searching beat generating on price — and on quality it wasn’t even close.
- Music from the YouTube Audio Library — monetization-safe, no attribution required. And the moment the track was chosen we adopted a “music lock”: the song decides the film’s length (the final cut only adds 3 seconds of closing silence, for 3:26.6), and the song itself is never touched. The edit conforms to the music — never the other way around.
To be fully honest, generated SFX weren’t wiped out entirely. Sounds the libraries simply didn’t have — cicadas, the chick’s little voice — kept their generated versions. The boundary, as we found it: ambient noise is usable; anything that needs to carry a pitch — instruments, jingles — is where it breaks down.
Every license was read in the original and logged in a table — with free sources, the license chain is your lifeline (one free pack I’d grabbed myself was disqualified for an unclear license trail, quality notwithstanding).
The Final Call Is Always Human — Why the Machine-Timed Beat Felt Worse
However cheap AI and code got, the final judgment stayed human. The final gate of every stage was my eyes and ears — it was me who listened to the 4:21 first cut and ordered the big surgery (“get it under 4 minutes, strip the sound effects, one song only”), and me who rejected all 12 opening-sound candidates and picked the final one from the free library by ear.
One incident sums it up. We measured the music’s BPM (109.1) and aligned all 12 transition points — nine cut boundaries and three SFX impacts — to the beat with mathematical precision. On paper, perfect. Then I listened — “this got worse?” We rolled back every one of them. Mathematically correct alignment didn’t agree with human ears. Out of this came the third lesson: the most expensive resource isn’t the API — it’s human eyes-and-ears time. Every attempt to replace that judgment with a number failed in this project.
On “Fully Automated AI Video” Ads — What Works and What Doesn’t
If you’re reading this, you’ve seen the ads: “a whole YouTube channel automated from one prompt.” We effectively built a similar setup ourselves in this production, so we can separate what works from what doesn’t.
The generative video quality itself is genuinely good. A short clip really does come out in minutes. The jolt of typing one line and getting a plausible 8-second video is not exaggerated; still-image quality is excellent, and per-clip prices are as cheap as advertised. Our first clip came out exactly that way.
But you will hit the following walls. In the order we did:
- The same character doesn’t show up twice. One clip is perfect; from the second clip on, it’s a different creature. That’s why the videos in those ads are all about 8 seconds long — and without a reference-image system, a long video starring one consistent character remains a serious challenge.
- The failures never make it on screen. The two clips of ours that morphed mid-playback are exactly this. You’d never know from our finished film that they existed — and ad demo reels, too, can be assembled from only the takes that worked. Watch with that in mind.
- “Automatic” ends where assembly begins. Splitting cuts, setting timing, making it add up to a story — the actual work of filmmaking — no tool did automatically. Even where AI executes, a human still has to set the goal and steer the refinement.
- Highly standardized content will probably get automated — but building that pipeline, and the ideas inside it, still take human insight and involvement.
The Ledger
| Item | Means | Spend |
|---|---|---|
| Generative AI usage — 21 performance-clip generations + music/SFX attempts | fal (Veo 3.1 fast · MiniMax · CassetteAI) | $25.28 (measured) — mostly the acting clips. Generated music/SFX mostly failed; a few made the cut |
| 29 first-frame & background images | gpt-image-2 (OpenAI) | ~$8 (estimated from high-quality pricing) |
| SFX library, 1,802 files | Sonniss · Kōka-on Lab · Kenney | $0 |
| Final music | YouTube Audio Library | $0 |
| Storyboard / code / assembly / review / compositing / render | AI subscription (Claude) + my laptop | Flat rate (zero extra) |
Total: about $33 — three movie tickets. And three quarters of it is concentrated in one place: the actor’s performance.
A Checklist If You Want to Try This
- Split what you’ll generate from what you’ll do in code, first. Whatever charges per use (video generation): minimize. Whatever you’ll revise endlessly (camera, timing, editing): code.
- Don’t ask Claude to be the video generator — the results are poor. Claude’s place is commanding the agents and tools. But every code-driven video effect is fully under Claude’s control. Be clear-eyed about what it’s good at and what it isn’t.
- Before real spending, run the whole pipeline once for a dollar or two (pre-flight). If an assumption collapses, stop right there.
- Build a character reference set (reference sheet) and attach it to every generation. Prompt text alone will not hold consistency.
- Key color is decided by your character’s palette. Test keying on stills (free) before spending on video.
- Don’t trust frame-strip review. Always review in actual playback, and consider a code workaround before regenerating a failed cut.
- Search before you generate sound effects. Sonniss GDC, Kenney, Kōka-on Lab — professional quality, free. Generate only what the libraries don’t have, and read the license originals yourself.
- Once the music is chosen, conform the film to the music (music lock). Do it the other way and the edit loops forever.
- Keep the final call human. In our shop, numbers and automation never once beat human eyes and ears.
One last thing. The most valuable output of this production isn’t the film. The magenta numbers, the review rules, the sound-sourcing order, the video-production skills — everything we learned by crashing into it is now written down as procedures for the next production. That’s why film #2 will be cheaper and faster than film #1. The final lesson of ultra-low-budget production: when you finish a film, keep the “how it was made” along with the film.
The chick passed the audition. The next hire is in the works. 🐤